About this Post
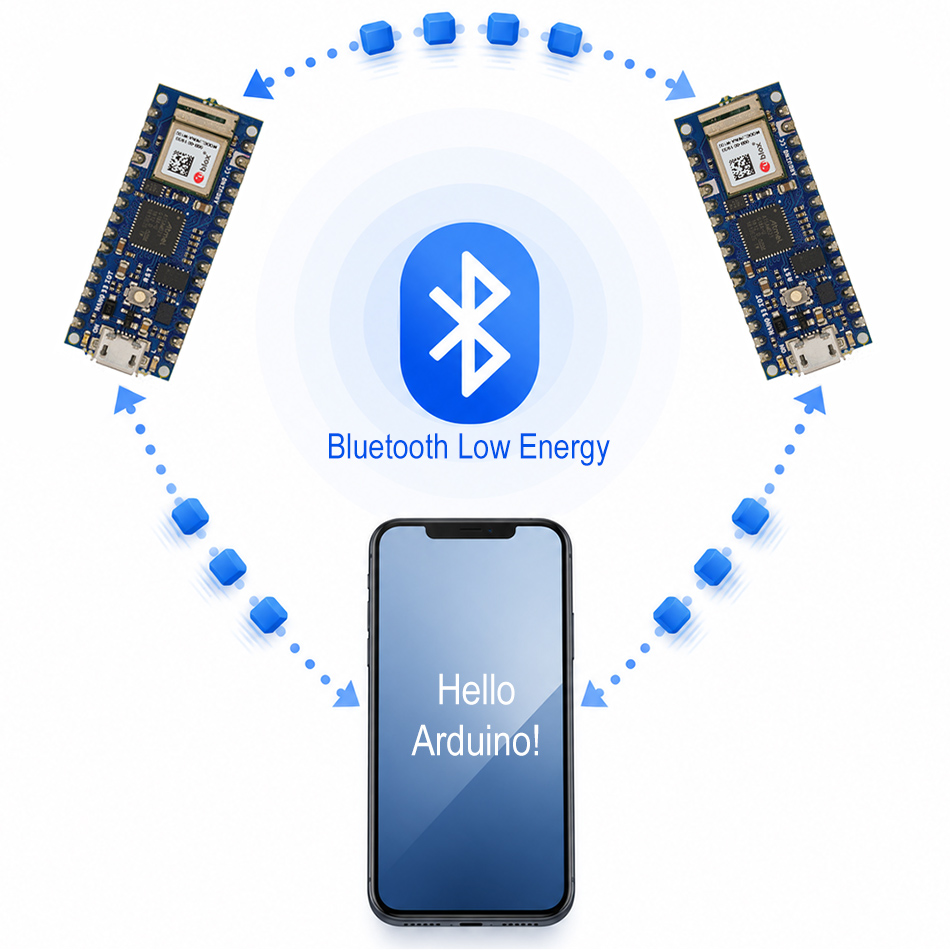
After discussing Bluetooth Low Energy (BLE) on the ESP32 in my last post, I would now like to explain how you can use BLE on Arduino boards using the ArduinoBLE library. Of course, there are many similarities between using BLE on ESP32 and Arduino boards, but the libraries differ so much that I thought it made sense to split this into two separate posts. The structure of this post, however, is essentially the same.
I won’t go over the basic BLE concepts—such as “service,” “characteristic,” “peripheral,” and “central”—again here. If you need more information, check here.
What to expect in this article:
- ArduinoBLE Minimal Sketch
- Event Handlers (Callbacks)
- Notify and Descriptors
- Connecting two Arduinos via BLE
- Appendix – Sending Structures
Preparation
To follow along with the examples in this post, you will first need two BLE-capable boards that are supported by the ArduinoBLE library. As of today, and to the best of my knowledge, these are the following Arduino boards:
- UNO WiFi Rev2, UNO R4 WiFi
- MKR WiFi 1010
- Nano 33 IoT, Nano 33 BLE (including Sense and Sense Rev2), Nano RP2040
- Nicla Sense ME, Nicla Voice, Nicla Vision
- Opta
- Portenta H7, Portenta C33
BLE communication also works between different boards. So you do not need two identical models. But of course, I have not tested all the models and combinations myself.
For some boards, you may need to update the NINA-W102 firmware. You can identify the problem by the corresponding error messages that appear during compilation. But the update is no big deal: select the correct board and port in the Arduino IDE. Then go to Tools → Firmware Updater → Select Board → Check for Updates → Select Version (>3.0.0) → Install.
Then you will need the ArduinoBLE library, which you can easily install using the Arduino IDE’s library manager.
And finally, you will need a smartphone with a compatible BLE app, such as LightBlue or nRF Connect (for Android / for Apple). Alternatively, you can use a PC or laptop with a Bluetooth adapter. In that case, you will also need suitable apps, such as Bluetooth LE Explorer. I discussed some smartphone and PC apps in more detail in my last post.
ArduinoBLE Minimal Sketch
We will start off simple and turn our Arduino into a peripheral, assigning it a service and a characteristic. The characteristic should be writable by the client. We will use a suitable app on a PC or smartphone as the client. Here’s the sketch:
#include <ArduinoBLE.h>

BLEService myService("19B10000-E8F2-537E-4F6C-D104768A1214");
BLEStringCharacteristic myCharacteristic("19B10001-E8F2-537E-4F6C-D104768A1214", BLERead | BLEWrite, 40);

void setup() {
    Serial.begin(115200);
    while (!Serial);

    if (!BLE.begin()) {
        Serial.println("Starting BLE module failed!");
        while (1);
    }

    BLE.setLocalName("BLE Minimal"); // "Advertising Name"
    // BLE.setDeviceName("BLE Minimal"); // Device Name
    BLE.setAdvertisedService(myService);

    myService.addCharacteristic(myCharacteristic);
    BLE.addService(myService);

    myCharacteristic.writeValue("Hello Smartphone!");

    BLE.advertise();

    Serial.println("BLE Minimal Sketch");
}

void loop() {
    BLEDevice central = BLE.central();

    if(central) {
        Serial.print("Connected to central: ");
        Serial.println(central.address());

        while (central.connected()) {
            if (myCharacteristic.written()) {
                if (myCharacteristic.value()) {
                    Serial.println(myCharacteristic.value());
                }
            }
        }

        Serial.println("Disconnected from central.");
    }
}
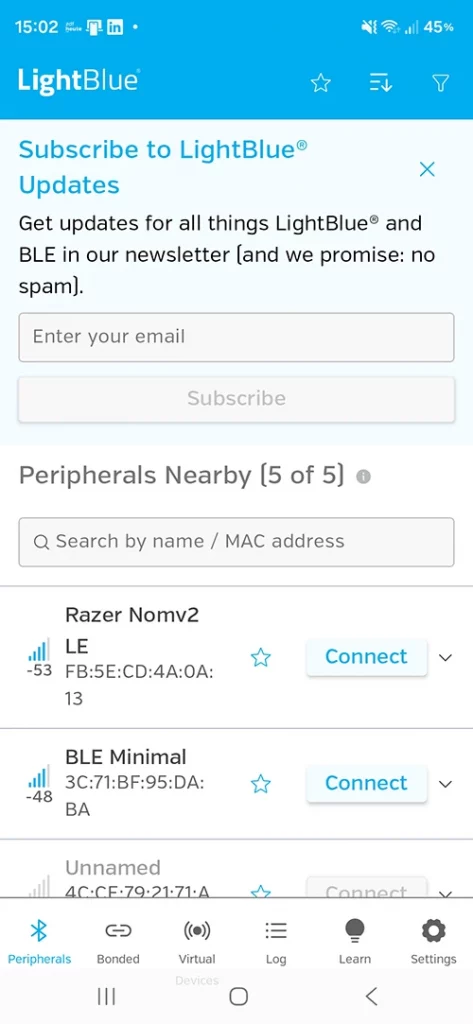
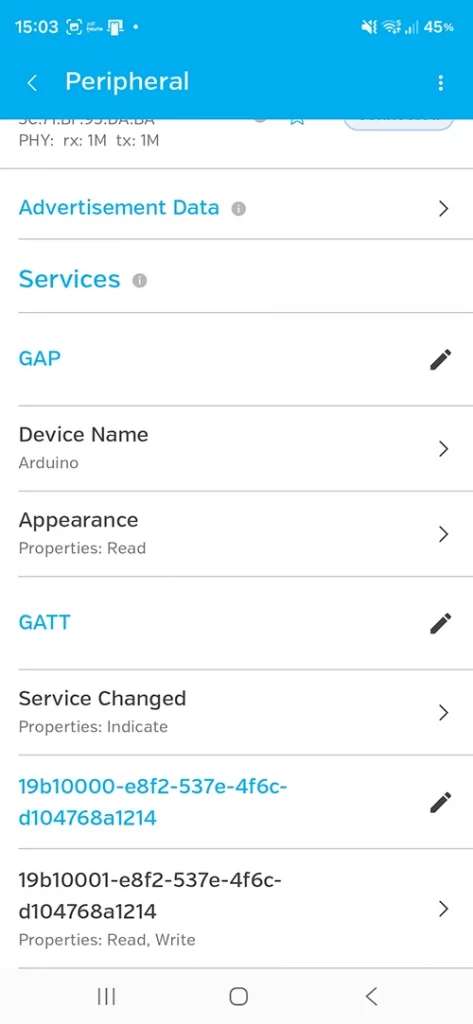
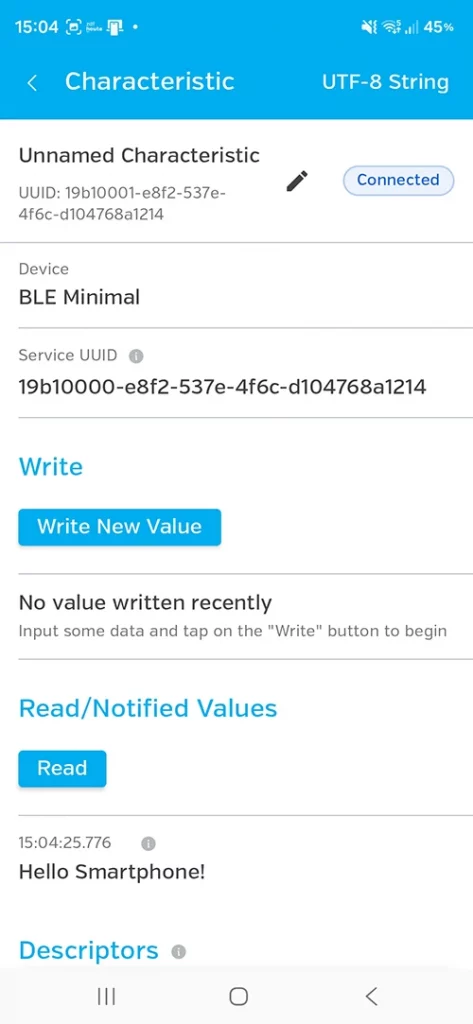
Upload the sketch, open your BLE app (such as LightBlue), and search for the “BLE Minimal” peripheral. Connect to it, then go to the corresponding characteristic. If you tap or click “Read,” you should see the value of the characteristic, which is “Hello Smartphone.” If you only see numbers, you will need to change the format to UTF-8. In nRF Connect, you will need to tap the service before the characteristic, and the down arrow corresponds to “read.”
Then click “Write New Value” (nRF Connect: up arrow) and enter a new value, such as “Hello Arduino.” If necessary, you may also need to change the format to UTF-8 here. You will see the new value immediately in the serial monitor, and on the client (central), you will see the value the next time it reads.
This is what the output looked like on my smartphone using LightBlue (before changing the characteristic):
And this was the output on the serial monitor after writing the characteristic and the peripheral logging out of the central unit:

Explanations of the sketch
After including the ArduinoBLE library, use BLEService myService(uuid); to create the “myService” object and pass in the UUID (which you can choose freely). BLEStringCharacteristic myCharacteristic(uuid, permissions); creates the “myCharacteristic” characteristic object. Its UUID can also be chosen freely (provided it has not already been assigned elsewhere).
An object of the BLEStringCharacteristic class expects a string as its value. There is a separate class for all major data types, such as BLEFloatCharacteristic or BLEBooleanCharacteristic. You can find these classes (except for the String class) in the ArduinoBLE file BLETypedCharacteristics.h.
In addition to the UUID, you pass your characteristics object its properties (permissions). The most important ones are:
- BLERead: The characteristic value can be read.
- BLEWrite: The characteristic value may be written.
- BLEWriteWithoutResponse: Write without confirmation (required, for example, for Bluetooth LE Lab)
- BLENotify: The peripheral may notify the client device of changes to characteristic values.
You can find a list of all properties in the “BLEproperty” enum in BLEProperty.h.
Use BLE.begin() to initialize your Arduino’s BLE functions.
You can set the name used for advertising with setLocalName(); in other words, you will see this name in the list of available peripherals. It is worth noting that after disconnecting from the client, your peripheral may appear in the list under a different name. In my case, it was “Arduino.” “Arduino” was the default device name. If you want to change this behavior, change the device name using setDeviceName().
Further explanations in short:
- Using
BLE.setAdvertisedService(myService);, the UUID frommyServiceis included in the advertising data. - Using
myService.addCharacteristic(myCharacteristic);, we add the characteristicmyCharacteristicto the servicemyService. BLE.addService(myService);adds the service to the local GATT server.myCharacteristic.writeValue()updates the value of the characteristic.BLEDevice central = BLE.central();creates a BLEDevice object named “central.” If a central is connected, this object represents the connected central. Otherwise, when queried withif (central), it evaluates to false.central.address();returns the MAC address of the central.- The function
central.connected()checks whether the central is still connected. If not, we exit the while loop. Becausecentralis recreated, the checkif (central)returns “false” until a new connection is established. - Using
myCharacteristic.written();, we check whether the central has assigned a new value to the characteristic.
Event Handlers (Callbacks)
In the next example, we will use the write function to switch the Arduino board’s LED on and off. It is actually a simple task: a specific value of the characteristic means “turn the LED on,” while another means “turn the LED off.” However, constantly checking the value to see if it has changed is a bit impractical. It would be more elegant if these actions were performed automatically. And that is exactly what the event handler functions in the ArduinoBLE library are for. In principle, they correspond to the callback functions I introduced in my last post about BLE with the ESP32.
And since we are on the topic of event handler functions, let us use them to be notified when a central connects to our Arduino or when the connection is lost.
Here is the sketch:
#include <ArduinoBLE.h>

BLEService ledService("19B10000-E8F2-537E-4F6C-D104768A1214");
BLEByteCharacteristic switchCharacteristic("19B10001-E8F2-537E-4F6C-D104768A1214", BLERead | BLEWrite);

const int ledPin = LED_BUILTIN;

void setup() {
    Serial.begin(115200);
    while (!Serial);

    pinMode(ledPin, OUTPUT);

    if (!BLE.begin()) {
        Serial.println("Starting BLE module failed!");

        while (1);
    }

    BLE.setLocalName("LED_Switch");
    BLE.setDeviceName("LED_Switch");
    BLE.setAdvertisedService(ledService);

    ledService.addCharacteristic(switchCharacteristic);

    BLE.addService(ledService);

    BLE.setEventHandler(BLEConnected, blePeripheralConnectHandler);
    BLE.setEventHandler(BLEDisconnected, blePeripheralDisconnectHandler);

    switchCharacteristic.setEventHandler(BLEWritten, switchCharacteristicWritten);

    switchCharacteristic.setValue(0);

    BLE.advertise();

    Serial.println(("BLE device active, waiting for connections..."));
}

void loop() {
    BLE.poll();
}

void blePeripheralConnectHandler(BLEDevice central) {
    Serial.print("Connected event, central: ");
    Serial.println(central.address());
}

void blePeripheralDisconnectHandler(BLEDevice central) {
    Serial.print("Disconnected event, central: ");
    Serial.println(central.address());
}

void switchCharacteristicWritten(BLEDevice central, BLECharacteristic characteristic) {
    // unused parameters
    (void)central;
    (void)characteristic;

    Serial.print("Characteristic event, written: ");

    if (switchCharacteristic.value()) {
        Serial.println("LED on");
        digitalWrite(ledPin, HIGH);
    } else {
        Serial.println("LED off");
        digitalWrite(ledPin, LOW);
   }
}
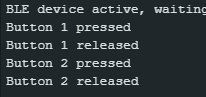
If you connect your Arduino board to the central, set the characteristic to 1 (hexadecimal format) once, then to 0, and then disconnect, you should see output like the one shown below on the serial monitor. On the board, you will see the board LED turn on and then off again.

Explanations to the sketch
Much of the sketch is already familiar. To control the LED, we define the service ledService with the characteristic switchCharacteristic. What is new is that we are using the data type byte for the characteristic (BLEByteCharacteristic).
We define the event handlers using the function setEventHandler(). There is one version for the BLE object (BLE.setEventHandler()) and one for the characteristics (switchCharacteristic.setEventHandler()). You pass the event and the freely chosen name of the event handler function to the function. You are already familiar with this principle from interrupts.
The following events are defined for the characteristics:
- BLESubscribed / BLEUnsubscribed: A central has subscribed to the characteristic or canceled the subscription.
- BLERead, BLEWritten (same as: BLEUpdated): A central has read or written to the characteristic.
The following events are defined for the BLE object:
- BLEConnected / BLEDisconnected: A central unit or a peripheral unit has been connected or disconnected.
- BLEDiscovered: The Arduino, acting as the central unit, detected a peripheral during scanning.
The connected central is passed to the BLE event handlers. The event handler for the characteristic receives not only the central but also the triggering characteristic. Nevertheless, in the event handler function, we use switchCharacteristic and not the passed parameter characteristic. This is because the data type of the passed parameter is the BLECharacteristic base class and not BLEByteCharacteristic. The function value() of the base class (i.e., BLECharacteristic::value()) is defined as const uint8_t* value() const;. Its return value is therefore a pointer, which would complicate matters (at least for C++ beginners). On the central side, we will have to address this challenge later.
You could also omit the expressions (void)characteristics; and (void)central;. However, you might see a warning about “unused parameters.” Here, we are performing what is known as a “cast to void,” which essentially tells the compiler: I am intentionally not using these parameters.
BLE.poll() checks and processes pending BLE events and, if necessary, calls the registered event handlers for them.
Why do I have to poll here, but not with the ESP32?
So it seems the callbacks do not run quite as automatically as I had promised; otherwise, we would not have to poll. And anyone who has read my last post about BLE with the ESP32 might wonder why there was no need to use a counterpart to BLE.poll() there. The answer is: the ESP32 also “polls,” but it does so automatically in the background using FreeRTOS.
The next question is: What happens if the Arduino is busy with other time-consuming tasks in loop() meanwhile? Does it miss something because of a delayed BLE.poll()? To test this, I inserted various delays into loop(). As a result, establishing the connection in LightBlue took approximately 14 times the delay time. It appears that there are multiple rounds negotiation, and each negotiation step is delayed by the delay time. Toggling the LED had a delay of up to a maximum of one delay time.
In my tests, switching commands sent in quick succession (period = < delay time) were not lost but were processed individually at intervals of DelayInSeconds. So it is best to keep loop() as lean as possible.
Notify and Descriptors
In the previous example, the central changed the characteristic value, and we used a callback function on the peripheral to be automatically notified of this change. In the following example, we will reverse the process. The peripheral changes the characteristic, and we want to be automatically notified of this on the central device. To achieve this, we use the “notify” characteristic property.
The event that triggers the update (write process) of the characteristic is pressing or releasing a button. And to make things a little more interesting, we are using two buttons. We will set up a characteristic for each button—not because we have to or because it is practical, but simply to try working with two characteristics.
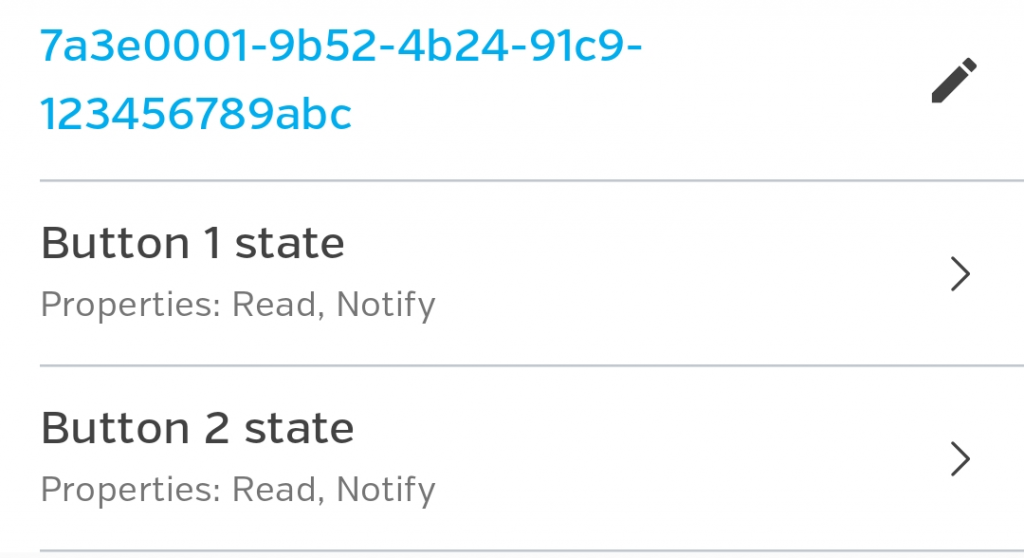
Since it is a bit inconvenient to pick the characteristics on the central device by their UUID, we will give them names: “Button 1 state” and “Button 2 state.” To set up these names, we use a descriptor. Just as there are characteristics predefined by the Bluetooth SIG, there are also predefined descriptors. The descriptor for naming characteristics is called “Characteristic User Description” and has the UUID 0x2901.
To try out the following sketch, connect two pushbuttons with one side each to pins 6 and 7 on your Arduino board. Connect the other sides of both pushbuttons to GND.
Here is the sketch:
#include <ArduinoBLE.h>

#define SERVICE_UUID "7a3e0001-9b52-4b24-91c9-123456789abc"
#define BUTTON1_UUID "7a3e0002-9b52-4b24-91c9-123456789abc"
#define BUTTON2_UUID "7a3e0003-9b52-4b24-91c9-123456789abc"

const int button1Pin = 6;
const int button2Pin = 7;

BLEService buttonService(SERVICE_UUID);

BLEStringCharacteristic button1Char(
    BUTTON1_UUID, BLERead | BLENotify, 25);

BLEStringCharacteristic button2Char(
    BUTTON2_UUID, BLERead | BLENotify, 25);

BLEDescriptor button1Desc("2901", "Button 1 state");
BLEDescriptor button2Desc("2901", "Button 2 state");

bool lastButton1 = HIGH;
bool lastButton2 = HIGH;

void setup() {
    Serial.begin(115200);
    while (!Serial);

    pinMode(button1Pin, INPUT_PULLUP);
    pinMode(button2Pin, INPUT_PULLUP);

    if (!BLE.begin()) {
        Serial.println("Starting BLE module failed!");
        while (1);
    }

    BLE.setLocalName("Arduino Two Buttons");
    BLE.setDeviceName("Arduino Two Buttons");

    BLE.setAdvertisedService(buttonService);

    buttonService.addCharacteristic(button1Char);
    buttonService.addCharacteristic(button2Char);

    button1Char.addDescriptor(button1Desc);
    button2Char.addDescriptor(button2Desc);

    BLE.addService(buttonService);

    button1Char.writeValue("Button 1 not yet pressed");
    button2Char.writeValue("Button 2 not yet pressed");

    BLE.advertise();

    Serial.println("BLE device active, waiting for connections...");
}

void loop() {
    BLE.poll();

    bool button1 = digitalRead(button1Pin);
    bool button2 = digitalRead(button2Pin);

    if (lastButton1 == HIGH && button1 == LOW) {
        button1Char.writeValue("Button 1 pressed");

        Serial.println("Button 1 pressed");
        delay(200); // debouncing
    }
    else if (lastButton1 == LOW && button1 == HIGH) {
        button1Char.writeValue("Button 1 released");

        Serial.println("Button 1 released");
        delay(200);
    }

    if (lastButton2 == HIGH && button2 == LOW) {
        button2Char.writeValue("Button 2 pressed");

        Serial.println("Button 2 pressed");
        delay(200);
    }
    else if (lastButton2 == LOW && button2 == HIGH) {
        button2Char.writeValue("Button 2 released");

        Serial.println("Button 2 released");
        delay(200);
    }

    lastButton1 = button1;
    lastButton2 = button2;
}
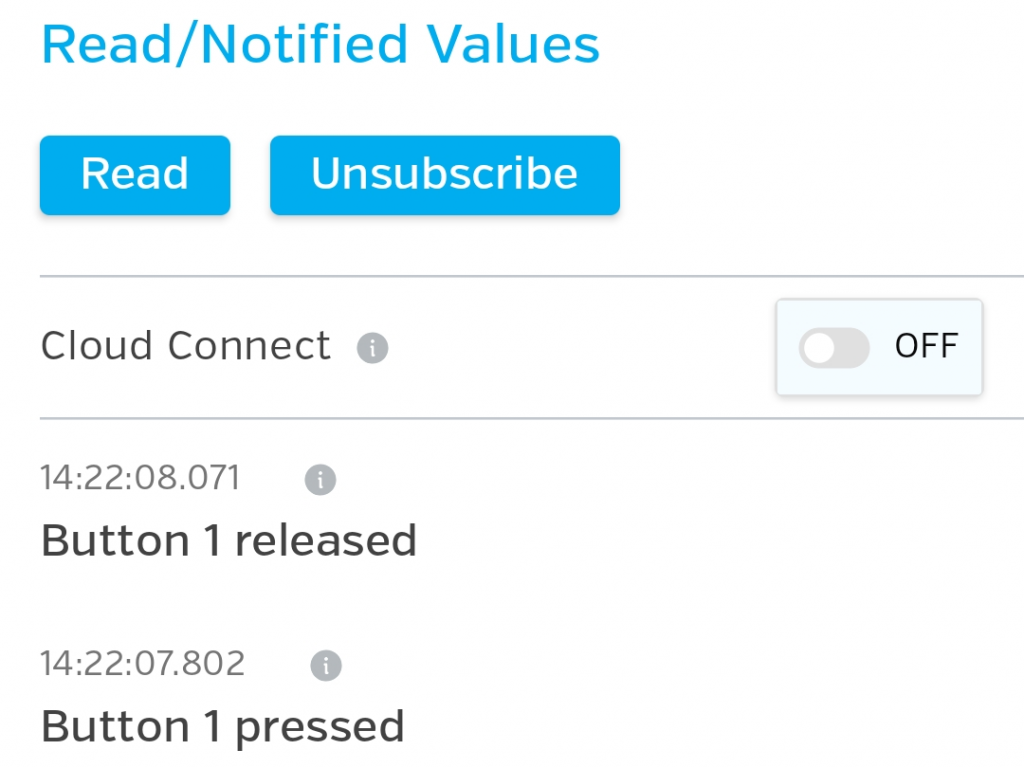
If you open LightBlue or a similar app, you will see that the characteristics now have names (middle image below). Select one of the characteristics and change the format from HEX to UTF-8. Then tap “Subscribe”. When you press the corresponding button now, you will see an output like the one shown in the lower right. This means you no longer need to tap “Read”.
Explanations to the sketch
I will just explain the new aspects:
- Using
BLERead | BLENotify, we assign the “Read” and “Notify” properties to the characteristics. BLEDescriptor button1Desc("2901", "Button 1 state");creates the descriptor objectbutton1Desc.- The parameter “2901” specifies that this is the “Characteristic User Description” descriptor.
- The second parameter specifies the name of the characteristic.
- The descriptor is assigned to the characteristic
button1Charbybutton1Char.addDescriptor(button1Desc);
And that’s essentially it. In loop(), the button states are continuously checked and compared with the states from the previous iteration. If anything has changed, the value of the corresponding characteristic is updated.
Anyone who has read my last post about BLE with the ESP32 might wonder why we do not also need to assign the CCCD (Client Characteristic Configuration Descriptor) with the UUID 0x2902 to the characteristics in this sketch so that the client (central) can subscribe to the characteristics. With the ESP32-BLE library, “notify” alone was not enough. The simple answer is: The ArduinoBLE library is more convenient in this regard and handles this automatically.
Additional Notes on the Sketch
This sketch is for illustrative purposes only and is not optimized. To ensure that button presses in rapid succession are not lost, I would use interrupts. In addition, we could easily get by with a single characteristic covering buttons 1 and 2. However, I wanted to show how to set up two characteristics.
Connecting two Arduinos via BLE
For educational purposes, the client side has so far been a smartphone, PC, or laptop. Now we are taking the next step by having two Arduino boards communicate via BLE. A message entered into the serial monitor of the server Arduino (peripheral) should be displayed on the serial monitor of the client Arduino, and vice versa. Furthermore, the two Arduinos should automatically reconnect.
The Server (Peripheral)
On the server side, there is nothing really new to discuss regarding BLE. However, we are combining some elements from previous examples into a single sketch. When the message is sent to the client (more specifically, when we change the value of the characteristic), we use “notify” so that the client does not have to constantly check for the value in loop(). To be notified of a message’s arrival (= Write event) on the client side without having to constantly check “manually,” we use the characteristic function setEventHandler() with the event BLEWritten.
We also use the function of our peripheral, setEventHandler(), with the parameters BLEConnected or BLEDisconnected, to keep track of the connection status.
We use two characteristics for the messages we send and receive. RX_UUID is the UUID for receiving (R = receive), and TX_UUID is the UUID for sending (T = transmit).
#include <ArduinoBLE.h>

#define SERVICE_UUID "11111111-1111-1111-1111-111111111111"
#define RX_UUID      "22222222-2222-2222-2222-222222222222" // Central -> Peripheral
#define TX_UUID      "33333333-3333-3333-3333-333333333333" // Peripheral -> Central

BLEService textService(SERVICE_UUID);

BLEStringCharacteristic rxCharacteristic(
    RX_UUID, BLEWrite, 100);

BLEStringCharacteristic txCharacteristic(
    TX_UUID, BLERead | BLENotify, 100);

void setup() {
    Serial.begin(115200);
    while (!Serial);

    if (!BLE.begin()) {
        Serial.println("Starting BLE failed!");
        while (1);
    }

    BLE.setLocalName("Arduino BLE Peripheral");
    BLE.setDeviceName("Arduino BLE Peripheral");

    BLE.setAdvertisedService(textService);

    textService.addCharacteristic(rxCharacteristic);
    textService.addCharacteristic(txCharacteristic);

    BLE.addService(textService);

    BLE.setEventHandler(BLEConnected, connectHandler);
    BLE.setEventHandler(BLEDisconnected, disconnectHandler);

    rxCharacteristic.setEventHandler(BLEWritten, rxWrittenHandler);

    BLE.advertise();

    Serial.println("Peripheral started");
}

void loop() {
    BLE.poll();

    if (BLE.connected() && Serial.available()) {
        String text = Serial.readStringUntil('\n');

        if (text.length() > 0) {
            txCharacteristic.writeValue(text);

            Serial.print("Sent: ");
            Serial.println(text);
        }
    }
}

void connectHandler(BLEDevice central) {
    Serial.print("Connected to central: ");
    Serial.println(central.address());

    Serial.println("Ready. Type in some text and press enter.");
}

void disconnectHandler(BLEDevice central) {
    Serial.print("Disconnected from central: ");
    Serial.println(central.address());
}

void rxWrittenHandler(BLEDevice central, BLECharacteristic characteristic) {
    (void)central;
    (void)characteristic;

    Serial.print("Received: ");
    Serial.println(rxCharacteristic.value());
}
The Client (Central)
The client side is new and includes a whole range of new features. Until now, the software (like LightBlue) has handled scanning for available BLE devices. We had then selected the device from the list and established a connection. Now, we first need to “teach” the central Arduino how to do all of this. Since this involves quite a few new things all at once, I have added an intermediate step: a central sketch that, for now, simply scans and displays the scan results.
Intermediate Step: The Client scans
The following sketch is essentially “Scan.ino” from the ArduinoBLE library examples. I have just expanded it a little.
#include <ArduinoBLE.h>

/* scan for specific devices or UUIDs - adjust and uncomment */
//#define SPECIFIC_UUID "11111111-1111-1111-1111-111111111111"
//#define SPECIFIC_NAME "Arduino BLE Peripheral"
//#define SPECIFIC_ADDRESS "3c:71:bf:95:da:ba"

void setup() {
  Serial.begin(9600);
  while (!Serial);

  // begin initialization
  if (!BLE.begin()) {
    Serial.println("starting Bluetooth® Low Energy module failed!");

    while (1);
  }

  Serial.println("Bluetooth® Low Energy Central scan");

  // start scanning for peripheral
  BLE.scan();
  /* scan for specific devices or UUIDs - adjust and uncomment*/
  //BLE.scanForUuid(SPECIFIC_UUID);
  //BLE.scanForName(SPECIFIC_NAME);
  //BLE.scanForAddress(SPECIFIC_ADDRESS);
}

void loop() {
  // check if a peripheral has been discovered
  BLEDevice peripheral = BLE.available();

  if (peripheral) {
    // discovered a peripheral
    Serial.println("Discovered a peripheral");
    Serial.println("-----------------------");

    // print address
    Serial.print("Address: ");
    Serial.println(peripheral.address());

    // print the local name, if present
    if (peripheral.hasLocalName()) {
      Serial.print("Local Name: ");
      Serial.println(peripheral.localName());
    }

    // print the advertised service UUIDs, if present
    if (peripheral.hasAdvertisedServiceUuid()) {
      Serial.print("Service UUIDs: ");
      for (int i = 0; i < peripheral.advertisedServiceUuidCount(); i++) {
        Serial.print(peripheral.advertisedServiceUuid(i));
        Serial.print(" ");
      }
      Serial.println();
    }

    // print the RSSI
    Serial.print("RSSI: ");
    Serial.println(peripheral.rssi());

    Serial.println();
  }
}
Upload this sketch and the peripheral sketch to two Arduino boards. To make the scanner detect more than just the Arduino board, I also turned on my Bluetooth headphones. This was the output:
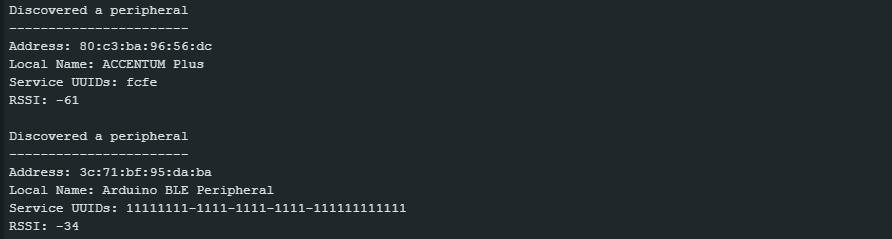
The scan is started using BLE.scan() in the setup. It is important to note the following:
- The scan continues to run in the background until you actively stop it with
BLE.stopScan(). That is why you can also use this sketch to find BLE devices that will not be available until later. - Before connecting a peripheral, you must stop the scan. Since we are not connecting any devices in this sketch, we will not stop the scan.
I find the function name available() in BLEDevice peripheral = BLE.available(); to be poorly chosen, as it does not immediately reveal how the function works. A name like “nextDiscoveredDevice()” would be more appropriate, in my opinion. Essentially, BLE.available() means: “Return the next BLE device discovered during the scan that has not yet been returned by available()“.
If another BLE device is found, the expression if (peripheral) is interpreted as true, and the loop is executed. The remaining lines are actually self-explanatory:
peripheral.address()returns the MAC address.peripheral.hasLocalName()checks whether the BLE device has a name.peripheral.localName()returns the name of the device.peripheral.hasAdvertisedServiceUuid())checks whether the device offers “advertised” services.peripheral.advertisedServiceUuidCount()will tell you the number of “advertised” services.peripheral.advertisedServiceUuid(i)returns the UUID of the i-th service.peripheral.rssi()returns the signal strength (Received Signal Strength Indicator) of the received BLE signal.
BLE.scanForUuid();filters by UUID.BLE.scanForName();searches for the device name (local name).BLE.scanForAddress();scans for the MAC address.
Comment out or uncomment the relevant lines and adjust them as needed to test the functions.
The Complete Client Sketch
#include <ArduinoBLE.h>

#define SERVICE_UUID "11111111-1111-1111-1111-111111111111"
#define RX_UUID      "22222222-2222-2222-2222-222222222222" // Central -> Peripheral
#define TX_UUID      "33333333-3333-3333-3333-333333333333" // Peripheral -> Central

void setup() {
    Serial.begin(115200);
    while (!Serial);

    if (!BLE.begin()) {
        Serial.println("Starting BLE failed!");
        while (1);
    }

    Serial.println("Arduino BLE Central");
    Serial.println("Searching peripheral...");

    BLE.scanForUuid(SERVICE_UUID);
}

void loop() {
    BLEDevice peripheral = BLE.available();

    if (peripheral) {
        Serial.print("Found peripheral: ");
        Serial.println(peripheral.address());

        BLE.stopScan();

        communicateWithPeripheral(peripheral);

        // communicateWithPeripheral() returns after disconnect
        Serial.println("Searching peripheral again...");
        BLE.scanForUuid(SERVICE_UUID);
    }
}

void communicateWithPeripheral(BLEDevice peripheral) {
    Serial.println("Connecting...");

    if (!peripheral.connect()) {
        Serial.println("Connection failed");
        return;
    }

    Serial.println("Connected to peripheral");

    if (!peripheral.discoverService(SERVICE_UUID)) {
        Serial.println("Service discovery failed");
        peripheral.disconnect();
        return;
    }

    BLECharacteristic rxCharacteristic =
        peripheral.characteristic(RX_UUID);

    BLECharacteristic txCharacteristic =
        peripheral.characteristic(TX_UUID);

    if (!rxCharacteristic || !txCharacteristic) {
        Serial.println("Characteristic not found");
        peripheral.disconnect();
        return;
    }

    if (!rxCharacteristic.canWrite()) {
        Serial.println("RX characteristic is not writable");
        peripheral.disconnect();
        return;
    }

    if (!txCharacteristic.canSubscribe()) {
        Serial.println("TX characteristic is not subscribable");
        peripheral.disconnect();
        return;
    }

    if (!txCharacteristic.subscribe()) {
        Serial.println("Subscription failed");
        peripheral.disconnect();
        return;
    }

    Serial.println("Subscribed to TX characteristic");
    Serial.println("Ready. Type in some text and press enter.");

    while (peripheral.connected()) {
        BLE.poll();

        // Text from peripheral received?
        if (txCharacteristic.valueUpdated()) {
            printReceivedText(txCharacteristic);
        }

        // Text entered in Serial Monitor?
        if (Serial.available()) {
            String text = Serial.readStringUntil('\n');

            if (text.length() > 0) {
                sendText(rxCharacteristic, text);

                Serial.print("Sent: ");
                Serial.println(text);
            }
        }
    }

    Serial.print("Disconnected from peripheral: ");
    Serial.println(peripheral.address());
}


void printReceivedText(BLECharacteristic characteristic) {
    char text[101];

    int length = characteristic.readValue(text, 100);

    text[length] = '\0'; // add null terminator

    Serial.print("Received: ");
    Serial.println(text);
}


void sendText(BLECharacteristic characteristic, const String &text) {
    characteristic.writeValue(
        text.c_str(),
        text.length()
    );
}
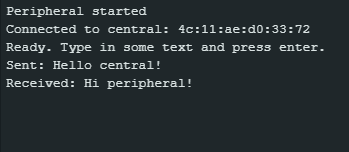
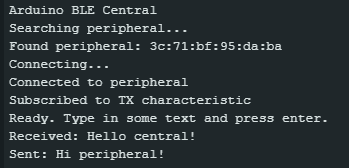
Upload the sketches to two BLE-enabled Arduinos and open the corresponding serial monitors. The Arduinos should connect automatically. Now you can enter messages on either side, and they will be displayed on the other side. Here is an example of the output:
Explanations to the sketch
First, just as we did on the peripheral side, we define a service UUID and the characteristic UUIDs for receiving and sending messages (from the peripheral’s perspective!).
In setup(), we initialize the BLE function and start the scan, specifically searching for the service UUID. In loop(), we check whether the peripheral with the desired service UUID was found. If so, the scan is stopped, and we initiate communication with the peripheral in communicateWithPeripheral(), passing the found peripheral to the function. If the connection is lost, the scan restarts.
In communicateWithPeripheral(), the connection is first established using peripheral.connect(). If that fails, the sketch goes back with return.
peripheral.discoverService(SERVICE_UUID) is used to “discover” the characteristics of the service. This is essential. With peripheral.characteristic(RX_UUID), we access the characteristic with the specified UUID that was previously discovered on the peripheral. The returned object BLECharacteristic serves as a local representation of this remote characteristic. The same process applies to the TX characteristic. if (!rxCharacteristic || !txCharacteristic)checks whether the characteristics actually exist.rxCharacteristic.canWrite()determines whether the RX characteristic can be written to.txCharacteristic.canSubscribe()tells you whether the TX characteristic is available for subscription.
Then we subscribe to the TX-Characteristic using txCharacteristic.subscribe().
As long as the central is connected to the peripheral (while (peripheral.connected())), the following occurs in each loop iteration:
- “polling”:
BLE.poll(), - check for an updated TX characteristic:
txCharacteristic.valueUpdated() - and, if necessary, any input to be sent to the serial monitor is processed: (
if (Serial.available())).
Processing the Characteristics
I would like to draw your attention once again to the functions printReceivedText() and sendText().
When processing the characteristics, it is important to know that on the central side it is the data type BLECharacteristic and not BLEStringCharacteristic. As explained above, value() returns or a BLECharacteristic a pointer of type const uint8_t*.
The function readValue() is overloaded, meaning there are several versions with different arguments, for example:
int readValue(uint8_t value[], int length);int readValue(void* value, int length);int readValue(xxxxx& value);withxxxxx=uint8_t,int8_t,uint16_t,int16_t,uint32_torint32_t.
The second variant is particularly useful. It is what makes readValue(text, 100) work in the first place. A void* is a generic pointer of no defined data type and can therefore point to memory locations of different data types. For example, you can pass the address of an float variable directly to readValue(): readValue(&floatVariable, sizeof(floatVariable)). In the appendix, I will show you how to handle structures in this context.
There are also various options for writeValue(), including int writeValue(const void* value, int length, bool withResponse = true);. Since text was previously read as a string object and writeValue() does not accept these, we use text.c_str(). This function returns a const char* pointing to the null-terminated string of the object String, which can then be passed to writeValue(). All clear? For less experienced Arduino users, this might all be a bit confusing. If you would like to learn more about strings and character arrays, you can read my article on this topic.
Alternative client sketch, non-blocking
The client sketch has a certain drawback. If the client has other tasks to perform—such as making an LED blink or continuously checking a button’s state (on the client)—where do I incorporate those? The sketch only returns to loop() if the connection is lost. On the other hand, if the connection is successful, the sketch remains at while(peripheral.connected()), but only in that case. If you look at the example sketches in the ArduinoBLE library—LEDControl.ino or SensorTagButton.ino—you will see that they are structured similarly and therefore have the same (potential!) problem.
The following sketch solves the problem by repeatedly returning to loop(), regardless of whether a connection exists or not. Since the sketch does not include any new functions, I will skip further explanations.
#include <ArduinoBLE.h>

#define SERVICE_UUID "11111111-1111-1111-1111-111111111111"
#define RX_UUID      "22222222-2222-2222-2222-222222222222"
#define TX_UUID      "33333333-3333-3333-3333-333333333333"

BLEDevice peripheral;
BLECharacteristic rxCharacteristic;
BLECharacteristic txCharacteristic;

bool connected = false;
bool scanning = false;

void setup() {
    Serial.begin(115200);
    while (!Serial);

    if (!BLE.begin()) {
        Serial.println("Starting BLE failed!");
        while (1);
    }

    startScan();
}

void loop() {
    BLE.poll();

    if (!connected) {
        handleConnection();
    }
    else {
        handleCommunication();
    }

    // doSomethingElse();
}

void startScan() {
    BLE.scanForUuid(SERVICE_UUID);
    scanning = true;
    Serial.println("Searching peripheral...");
}

void handleConnection() {
    if (!scanning) {
        startScan();
    }

    peripheral = BLE.available();

    if (!peripheral) {
        return;
    }

    BLE.stopScan();
    scanning = false;

    Serial.println("Peripheral found");
    Serial.println("Connecting...");

    if (!peripheral.connect()) {
        Serial.println("Connection failed");
        return;
    }

    if (!peripheral.discoverService(SERVICE_UUID)) {
        Serial.println("Service discovery failed");
        peripheral.disconnect();
        return;
    }

    rxCharacteristic = peripheral.characteristic(RX_UUID);
    txCharacteristic = peripheral.characteristic(TX_UUID);

    if (!rxCharacteristic || !txCharacteristic) {
        Serial.println("Characteristic not found");
        peripheral.disconnect();
        return;
    }

    if (!txCharacteristic.subscribe()) {
        Serial.println("Subscription failed");
        peripheral.disconnect();
        return;
    }

    connected = true;

    Serial.println("Connected");
    Serial.println("Ready. Type in some text and press enter.");
}

void handleCommunication() {
    if (!peripheral.connected()) {
        connected = false;

        Serial.println("Disconnected from peripheral");

        startScan();
        return;
    }

    if (txCharacteristic.valueUpdated()) {
        printReceivedText(txCharacteristic);
    }

    if (Serial.available()) {
        String text = Serial.readStringUntil('\n');
        text.trim();

        if (text.length() > 0) {
            sendText(rxCharacteristic, text);

            Serial.print("Sent: ");
            Serial.println(text);
        }
    }
}

void printReceivedText(BLECharacteristic characteristic) {
    char text[101];

    int length = characteristic.readValue(text, 100);

    text[length] = '\0';

    Serial.print("Received: ");
    Serial.println(text);
}

void sendText(BLECharacteristic characteristic, String text) {
    characteristic.writeValue(
        text.c_str(),
        text.length()
    );
}
Appendix – Sending Structures
To go into more detail, I would like to show you how to send structures—or, more precisely, how to use structures as values for a characteristic. As an example, on the peripheral side, we have a weather station that measures temperature (float) and humidity (int) and reports whether it is currently raining (bool). The data is updated every 10 seconds and made available to the client via BLE. Since we are only focusing on the principle here and do not actually have a weather station on the peripheral, we will work with fixed weather data.
Weather Station – Peripheral Sketch
First, here is the peripheral sketch:
#include <ArduinoBLE.h>

#define SERVICE_UUID "11111111-1111-1111-1111-111111111111"
#define WEATHER_UUID "11111112-1111-1111-1111-111111111111"

struct WeatherData {
    float temperature;
    int humidity;
    bool raining;
};

WeatherData weatherData;

BLEService weatherService(SERVICE_UUID);

BLECharacteristic weatherCharacteristic(
    WEATHER_UUID,
    BLERead | BLENotify,
    sizeof(WeatherData)
);

const unsigned long updateInterval = 10000;
unsigned long lastUpdate = 0;


void setup() {
    Serial.begin(115200);
    while (!Serial);

    if (!BLE.begin()) {
        Serial.println("Starting BLE failed!");
        while (1);
    }

    BLE.setLocalName("Weather Station");
    BLE.setDeviceName("Weather Station");

    BLE.setAdvertisedService(weatherService);

    weatherService.addCharacteristic(weatherCharacteristic);
    BLE.addService(weatherService);

    BLE.setEventHandler(BLEConnected, connectHandler);
    BLE.setEventHandler(BLEDisconnected, disconnectHandler);

    updateWeatherData();

    BLE.advertise();

    Serial.println("Weather Station Peripheral");
    Serial.println("Advertising...");
}

void loop() {
    BLE.poll();

    if (millis() - lastUpdate >= updateInterval) {
        lastUpdate = millis();

        updateWeatherData();

        weatherCharacteristic.writeValue(
            &weatherData,
            sizeof(weatherData)
        );

        Serial.println("Weather data updated");
    }
}

void updateWeatherData() {
    weatherData.temperature = 21.7;
    weatherData.humidity = 63;
    weatherData.raining = false;
}

void connectHandler(BLEDevice central) {
    Serial.print("Connected to central: ");
    Serial.println(central.address());
}

void disconnectHandler(BLEDevice central) {
    Serial.print("Disconnected from central: ");
    Serial.println(central.address());
}
Since there is no BLEStructCharacteristic or similar, we use the general BLECharacteristic as the data type for our weatherCharacteristic. It is passed WEATHER_UUID, the properties Read and Notify, and the length. The weather data is combined in the structure weatherData. Otherwise, the sketch has no new elements that I need to discuss in detail.
Weather Station: Central-Sketch
And here is the sketch for the central:
#include <ArduinoBLE.h>

#define SERVICE_UUID "11111111-1111-1111-1111-111111111111"
#define WEATHER_UUID "11111112-1111-1111-1111-111111111111"

struct WeatherData {
    float temperature;
    int humidity;
    bool raining;
};

BLEDevice peripheral;
BLECharacteristic weatherCharacteristic;

bool connected = false;
bool scanning = false;

void setup() {
    Serial.begin(115200);
    while (!Serial);

    if (!BLE.begin()) {
        Serial.println("Starting BLE failed!");
        while (1);
    }

    Serial.println("Weather Station Central");

    startScan();
}

void loop() {
    BLE.poll();

    if (!connected) {
        handleConnection();
    }
    else {
        handleCommunication();
    }

    // add additional code here
}


void startScan() {
    BLE.scanForUuid(SERVICE_UUID);
    scanning = true;

    Serial.println("Searching for Weather Station...");
}

void handleConnection() {
    if (!scanning) {
        startScan();
    }

    peripheral = BLE.available();

    if (!peripheral) {
        return;
    }

    BLE.stopScan();
    scanning = false;

    Serial.print("Peripheral found: ");
    Serial.println(peripheral.address());

    if (!peripheral.connect()) {
        Serial.println("Connection failed");
        return;
    }

    Serial.println("Connected");

    if (!peripheral.discoverService(SERVICE_UUID)) {
        Serial.println("Service discovery failed");
        peripheral.disconnect();
        return;
    }

    weatherCharacteristic =
        peripheral.characteristic(WEATHER_UUID);

    if (!weatherCharacteristic) {
        Serial.println("Weather characteristic not found");
        peripheral.disconnect();
        return;
    }

    if (!weatherCharacteristic.canSubscribe()) {
        Serial.println("Weather characteristic cannot be subscribed");
        peripheral.disconnect();
        return;
    }

    if (!weatherCharacteristic.subscribe()) {
        Serial.println("Subscription failed");
        peripheral.disconnect();
        return;
    }

    connected = true;

    Serial.println("Subscribed to weather data");

    printWeatherData();
}

void handleCommunication() {
    if (!peripheral.connected()) {
        connected = false;

        Serial.println("Disconnected from peripheral");

        startScan();
        return;
    }

    if (weatherCharacteristic.valueUpdated()) {
        printWeatherData();
    }
}

void printWeatherData() {
    WeatherData weatherData;

    int length = weatherCharacteristic.readValue(
        &weatherData,
        sizeof(weatherData)
    );

    if (length != sizeof(weatherData)) {
        Serial.println("Invalid weather data");
        return;
    }

    Serial.print("Temperature: ");
    Serial.print(weatherData.temperature, 1);
    Serial.println(" °C");

    Serial.print("Humidity: ");
    Serial.print(weatherData.humidity);
    Serial.println(" %");

    Serial.print("Raining: ");
    Serial.println(weatherData.raining ? "yes" : "no");

    Serial.println();
}
There is not much new here either. The key point is how the weather data is read—namely, via readValue(. Surprisingly simple, isn’t it?
&weatherData, sizeof(weatherData));
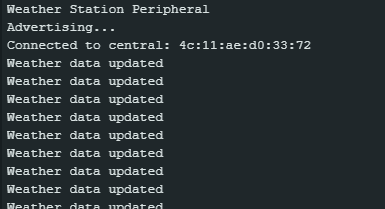
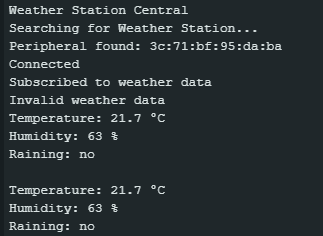
Here are the outputs of the sketches: