About this post
In the last post I described how you “hack” a remote shutter for your smartphone to control it with a microcontroller or an Arduino. However, simulating commercially available remote shutters with Bluetooth modules was not as easy as one might think.
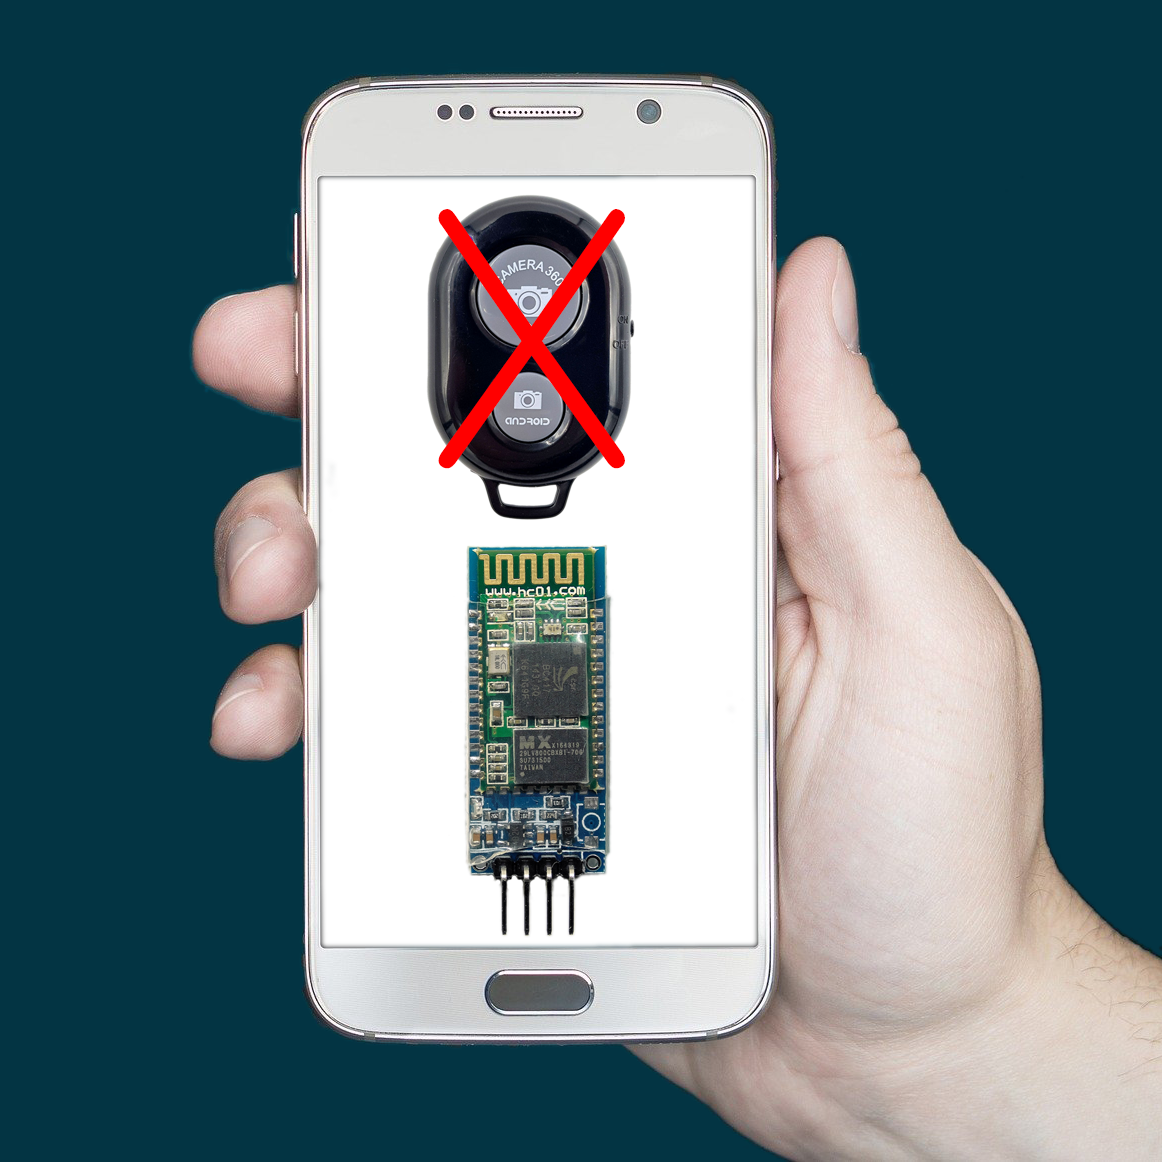
In this article I want to show how you can still use Bluetooth modules (HC-05 or HC-06) as remote triggers. To do this, I’ll show two ways, both of which go through MIT App Inventor.

App Inventor
As an interface between the Bluetooth (BT) modules and your smartphone, the development platform MIT App Inventor (later called “App Inventor”) is suitable. I have already introduced it in my article Controlling Arduino boards with your smartphone. This platform allows Android smartphone apps to be created graphically from blocks. Maybe you know Scratch? App Inventor works similarly. An introduction to App Inventor would require an entire post. From my experience I can say that after one or two afternoons you master the basics.
So I can only briefly outline how it works. If you are interested, I can also create a detailed introduction as a separate post (your feedback is welcome).
But don’t worry. You don’t necessarily have to learn how to use App Inventor to try out the examples in this post. I also provide the finished apps. You just can’t customize them if you don’t want to deal with App Inventor.
I have to start with a restriction
Using App Inventor, you can get your smartphone to start the smartphone camera app, but you still have to press the shutter button. This is not good news for the construction of a remote shutter, of course.
But I have found two ways to solve the problem. Luckily, there are smart people who develop so-called extensions for App Inventor. With the Camera Extension of Pura Vida Apps, direct access to the camera trigger works. This extension costs 12 USD (software developers also have to live on something!). But you can download the app I created with it for free (courtesy of Pura Vida Apps).
The second way is through the Tasker app. This allows you to create an app in 5 minutes that simply triggers a photo. And this app, in turn, can be accessed by an app created with App Inventor (without an extension). Tasker costs €3.59 (as of November 2020) – but hey, that’s just a beer in the pub. I can provide the app written with App Inventor (apk file), but for technical reasons I cannot provide the app created with Tasker (missing apk file export). But at least you don’t have to get into App Inventor if you don’t want to.
Remote shutter based on Camera Extension
Creating the app with App Inventor
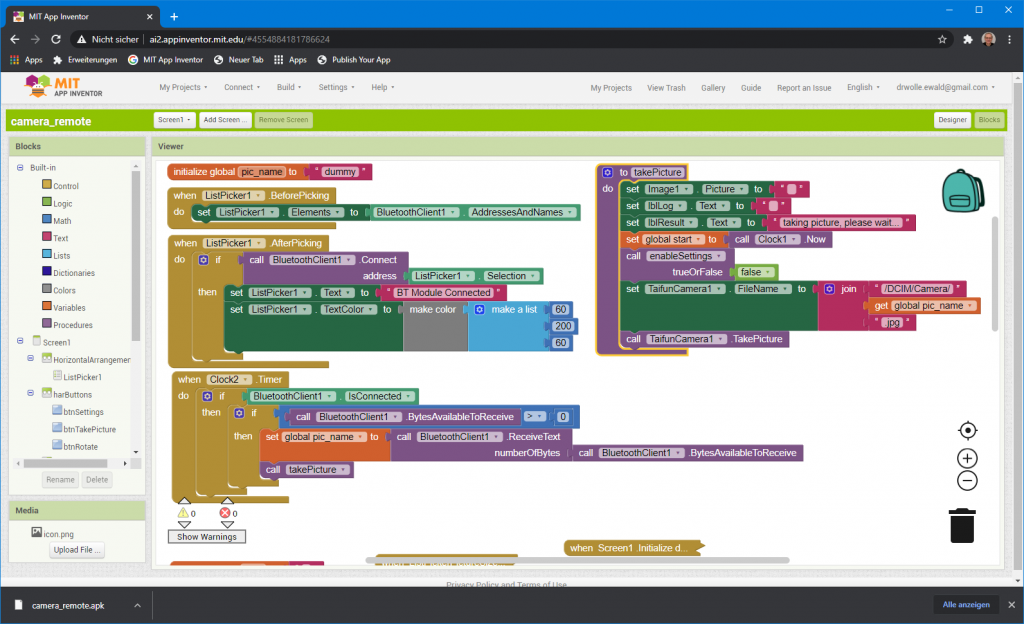
The Camera Extension comes with an example app called Camera. I took this as a basis and added a Bluetooth interface to trigger photos remotely. I called the result “camera_remote”. I can’t publish the blocks of the entire app, but here’s my added part that also gives you an idea of how App Inventor works.
Installing the finished app
During development with App Inventor, you can test your app on your smartphone. At the end, App Inventor provides an “.apk” file that you can use to install the app, independent of the development environment.
You can download the installation file “camera_remote.apk” from here on your smartphone (click on the link and then on the download icon on the right side). The installation should start automatically. However, your smartphone probably complains that the file is not from Google Play. If you trust me 😉 , then you install it anyway. The first time you open it, you’ll need to grant permissions to the app. Then there’s most likely an error message – just restart the app, and then it works permanently.
I have successfully tested the app on my Samsung Galaxy Note 8 and on my wife’s Huawei nova (CAN_L11). Of course, I cannot guarantee that it will work on every Android smartphone.
The remote shutter on the Arduino side
On the Arduino side (or whichever board or microcontroller you prefer), take an HC-05 or HC-06 BT module and upload the SoftwareSerial sketch from the examples for testing. I have described the BT modules and how you set them up in detail here.
#include <SoftwareSerial.h>
SoftwareSerial mySerial(10,11);

void setup() {
  Serial.begin(9600);
  Serial.println("Los geht's");
  mySerial.begin(9600);
}

void loop() { // run over and over
  if (mySerial.available()) {
    Serial.write(mySerial.read());
  }
  if (Serial.available()) {
    mySerial.write(Serial.read());
  }
}
You may still need to adjust the SoftwareSerial Sketch in terms of baud rate. It depends on which BT modules you use and how you set them up.
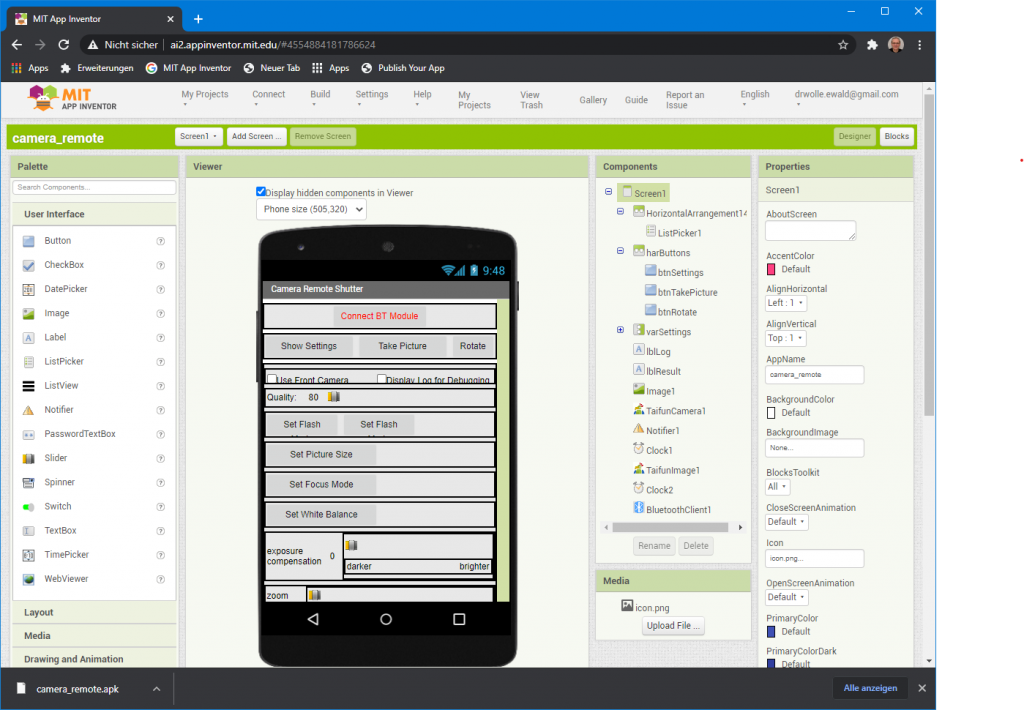
Remote shutter with Camera Extension – the result
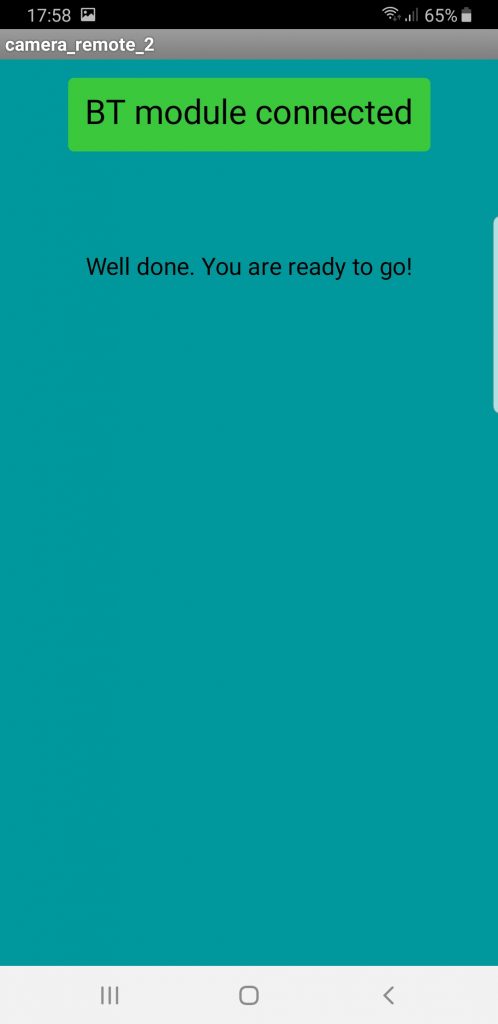
Once you have paired the Bluetooth module of your choice with your smartphone, you can connect it via the Camera Remote app by tapping “Connect BT Module” and selecting the module. Then it should change to “BT Module Connected” and the color should change from red to green.
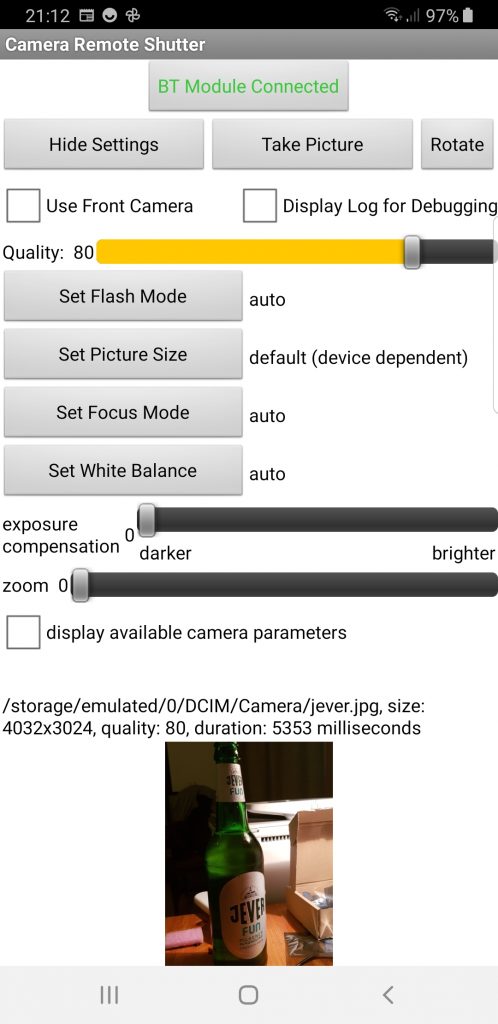
If you go to “Show settings”, then you can change some settings of your camera. With “Take Picture” you take a sample photo that is stored as “dummy.jpg” in your “camera/DCIM” folder. It appears reduced in size on the display.
And now comes the real highlight: enter an image name into the serial monitor on the computer and send it. The smartphone now takes a picture and saves it under this name. You can find it in the DCIM directory (but not necessarily in the gallery).
And then you can play. Simply set any condition under which a photo will be taken. E.g. attach a motion sensor and take a photo when motion is detected. All you have to do is call mySerial.print("irgendein Name"); for it.
The following sketch causes a photo to be taken every 15 minutes. The file name for the photo is simply the system time in seconds, i.e. millis()/1000.
#include <SoftwareSerial.h>
SoftwareSerial mySerial(10,11);
unsigned long startingTime = 0;

void setup() {
  mySerial.begin(9600),
  startingTime = millis();
}

void loop() { // run over and over
  unsigned long secs;
  if((millis() - startingTime) > 900000){
    secs = millis();
    secs /= 1000;
    mySerial.print(secs);
    startingTime = millis();
  }
  else{
    delay(1000);
  }
}
How to keep the display active
There is still one problem, namely when the smartphone is to remain photo-ready for a long time without interaction. At some point the screen gets dark and a little later the app doesn’t work anymore. Here are two solutions:
- Enable the developer options in the settings. To do this, search for “build number” in the settings and tap it seven times. After that, you go to the developer settings and activate “Leave active” (or similar) there. The disadvantage is that the whole thing only works as long the smartphone is being charged.
- Get an app that keeps the display on, e.g. Keep Screen On. The app is free.
Remote shutter based on the Tasker app
Creating the Tasker app
With Tasker, you first create an app that does nothing but take a photo when you launch it. So it is only a tool. In the appendix you will find a detailed step-by-step guide for creating the Tasker app. Here is the path in broad strokes:
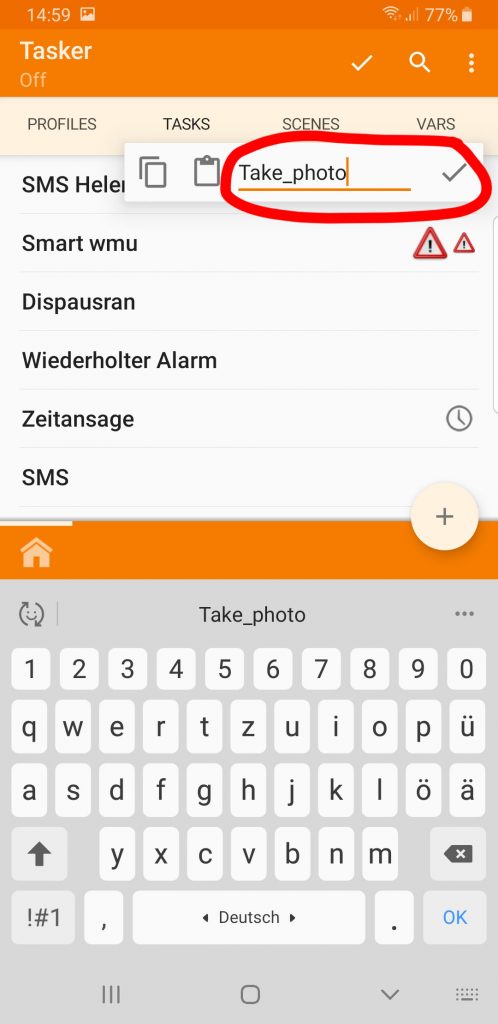
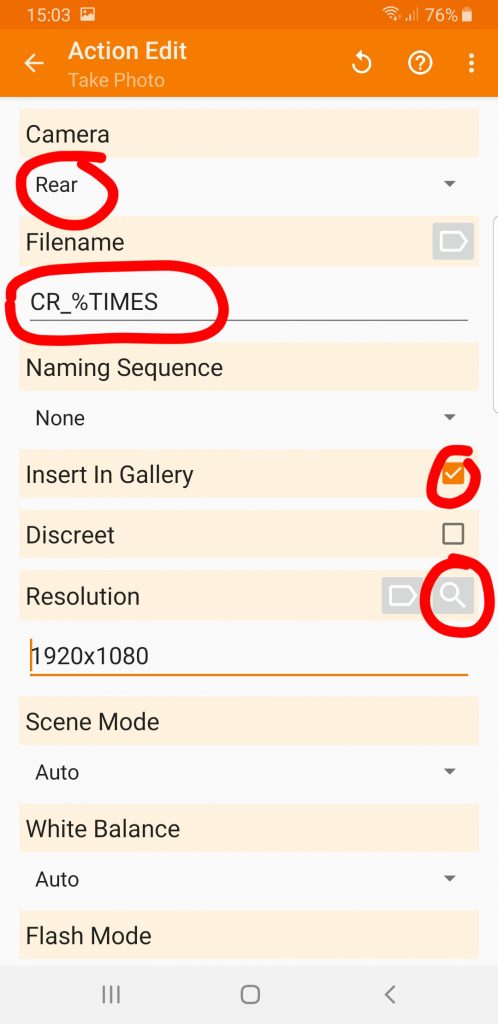
- You first create a new task “Take_photo” with Tasker.
- Select the settings for the photo, i.e. front or rear camera, which resolution, with flash / without flash, etc.
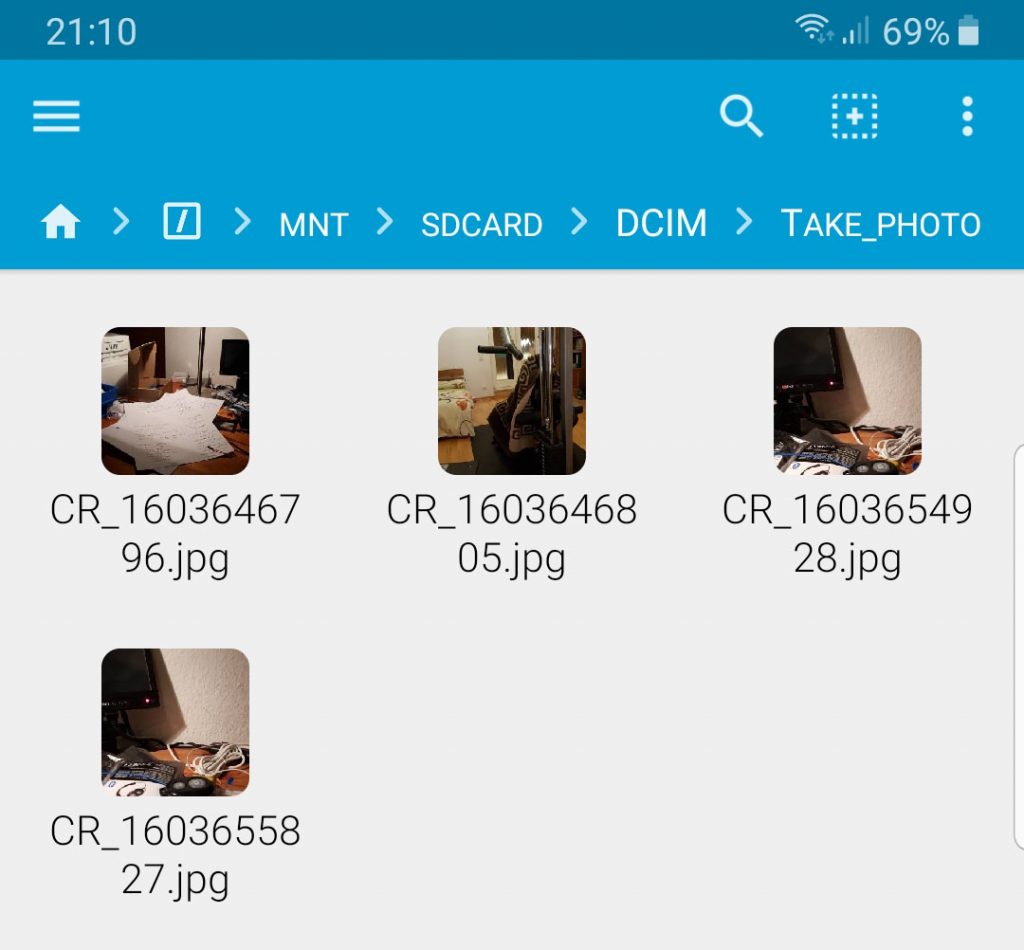
- The file name for the photo is assigned in the Tasker app. For me, it consists of “CR_” (for Camera Remote) and the UNIX time (that’s the time since 1.1.1970 in seconds). In Tasker, UNIX time is accessible as variable “%TIMES”.
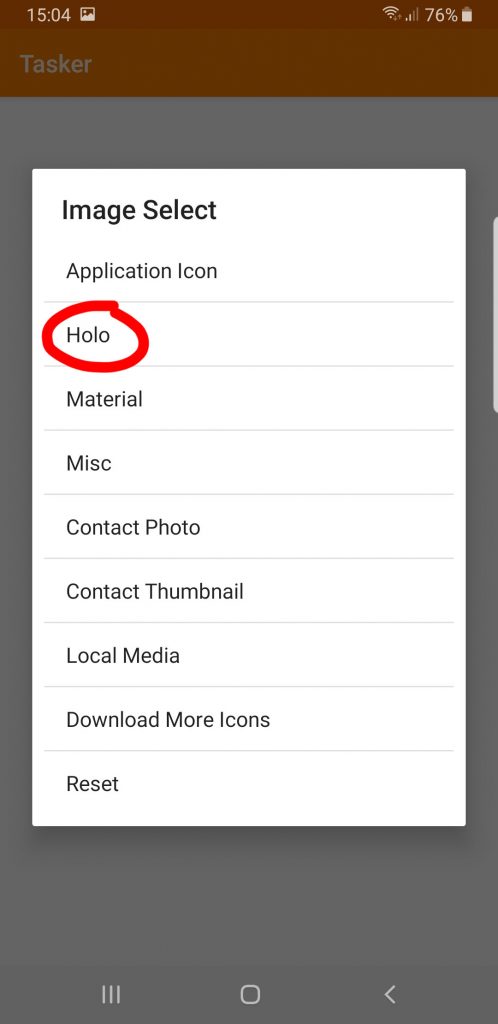
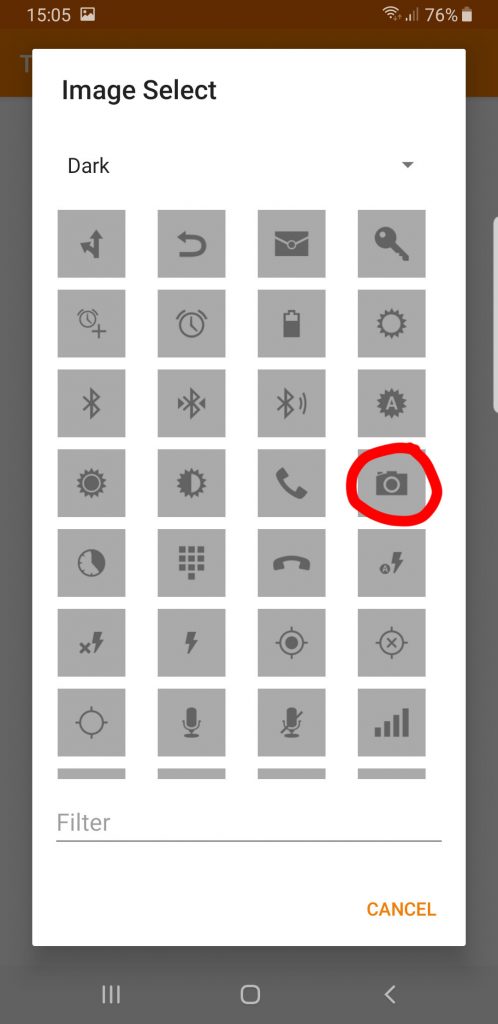
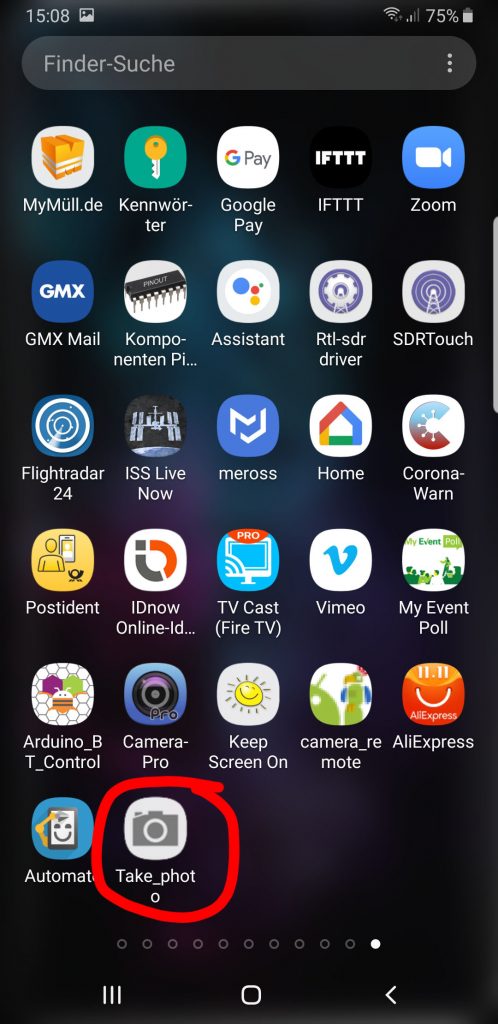
- If you want, you can assign an icon to the task and thus to the app.
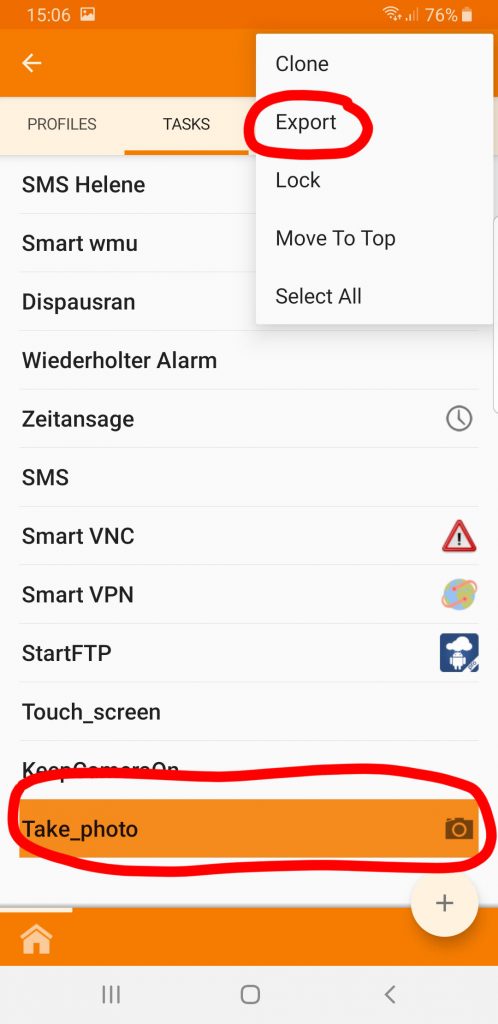
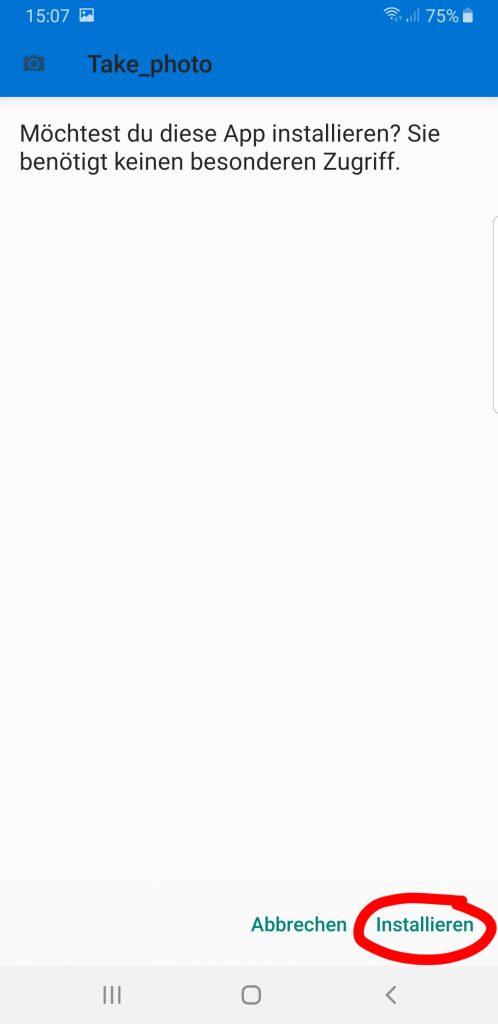
- Then you export the task as an app. Like the task, this is called “Take_photo”.
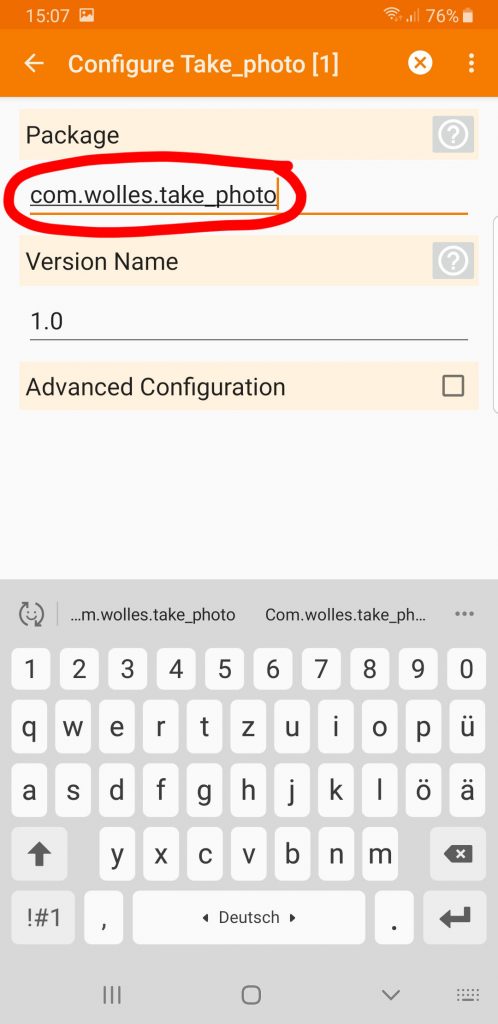
If you don’t want to engage with App Inventor and therefore use my pre-built apk file (which we’ll get to right away) created with App Inventor, you’ll need to use the default name for the package (“com.wolles.take_photo”) when exporting the app created with Tasker. The detailed instructions will make this clear to you.
Creating the app with App Inventor
Now we come to the creation of the main app, which calls the Take_photo app via Bluetooth. I named it – not very creatively – camera_remote_2. This app is completely my work. Therefore, I can offer you to download the “.aia” file here (again, follow the link and then click on the download icon on the right). Select this option if you want to do a little work with App Inventor, for example, to customize the app. You can import the .aia file into App Inventor and then have access to the design elements and blocks.
If you just want to download the result as a ready-to-install “.apk” file, then you can do so here
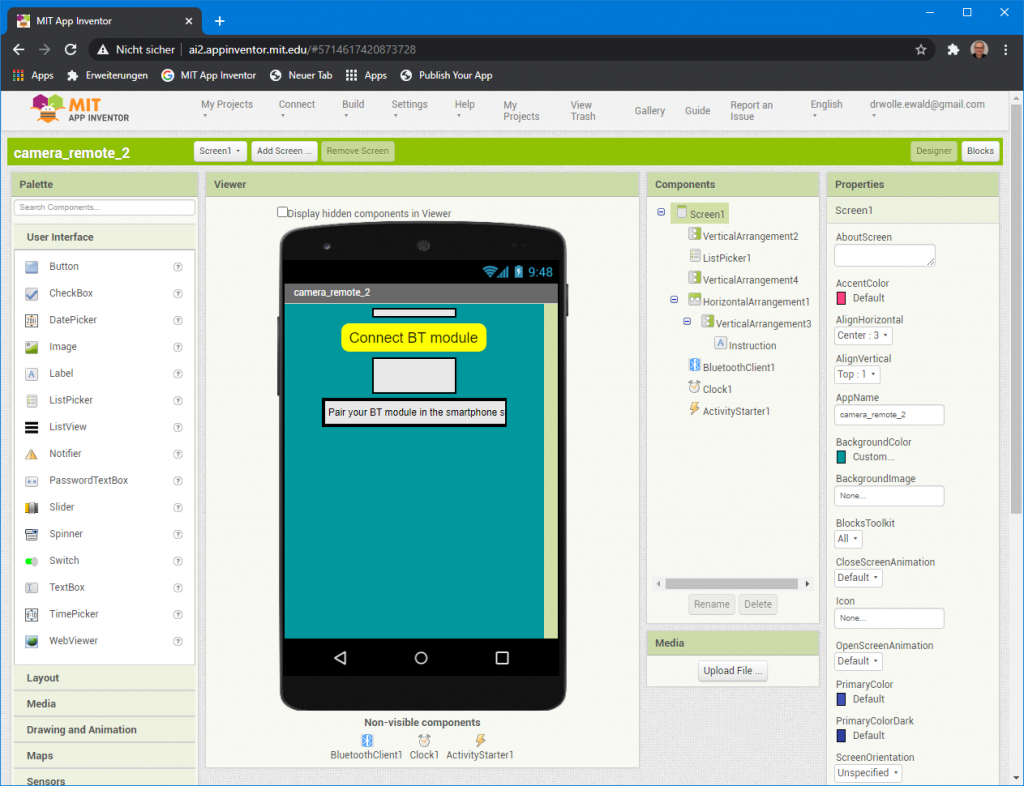
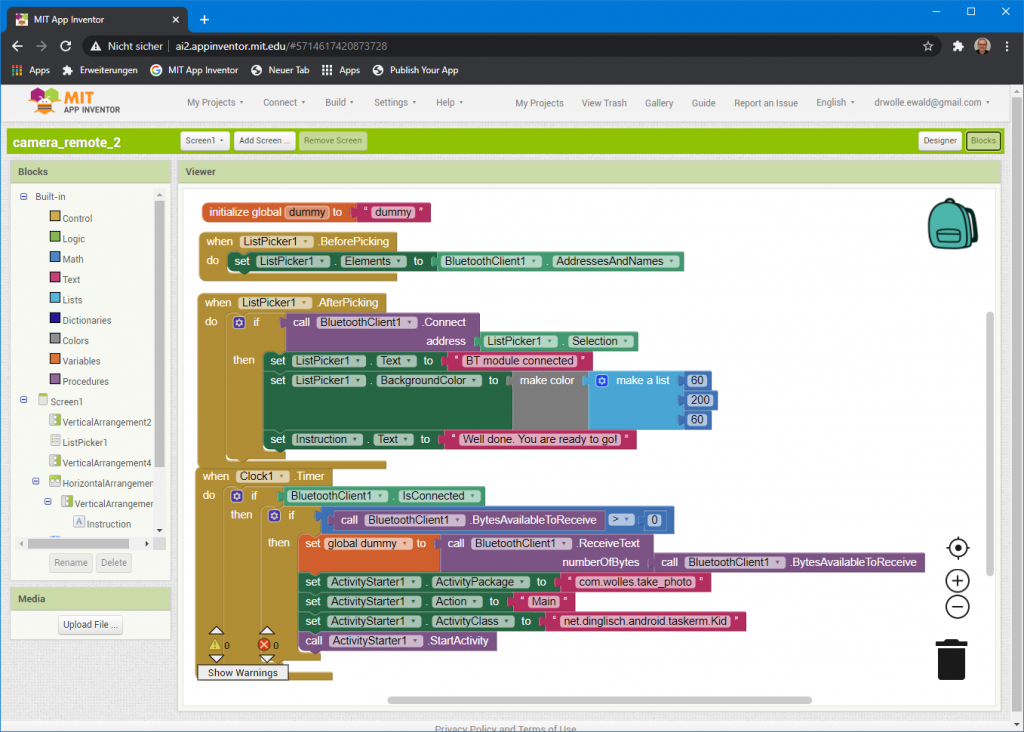
Explaining the development of the app in detail would be beyond the scope. But here’s at least a screenshot of the designer and blocks screen in App Inventor:
A key difference from the first way through the Camera Extension is that the Arduino does not pass a file name. This is done by the Tasker app. Any transmission of any string will trigger the photo.
The remote shutter on the Arduino side
On the Arduino side you just have to connect a HC-05 or HC-06 BT module and address it via SoftwareSerial.
The following sketch triggers a photo every 15 minutes.
#include <SoftwareSerial.h>
SoftwareSerial mySerial(10,11);
unsigned long startingTime = 0;

void setup() {
  mySerial.begin(9600),
  startingTime = millis();
}

void loop() { // run over and over
  if((millis() - startingTime) > 900000){
    mySerial.print("anything");
    startingTime = millis();
  }
  else{
    delay(1000);
  }
}
Remote shutter based on Tasker – the result
You have prepared the Arduino side and installed the apps Take_photo and camera_remote_2 on your smartphone. Switch on Bluetooth on your smartphone, pair the BT module and launch camera_remote_2. Tap “Connect BT module” and select the BT module from the list. This should look like this:
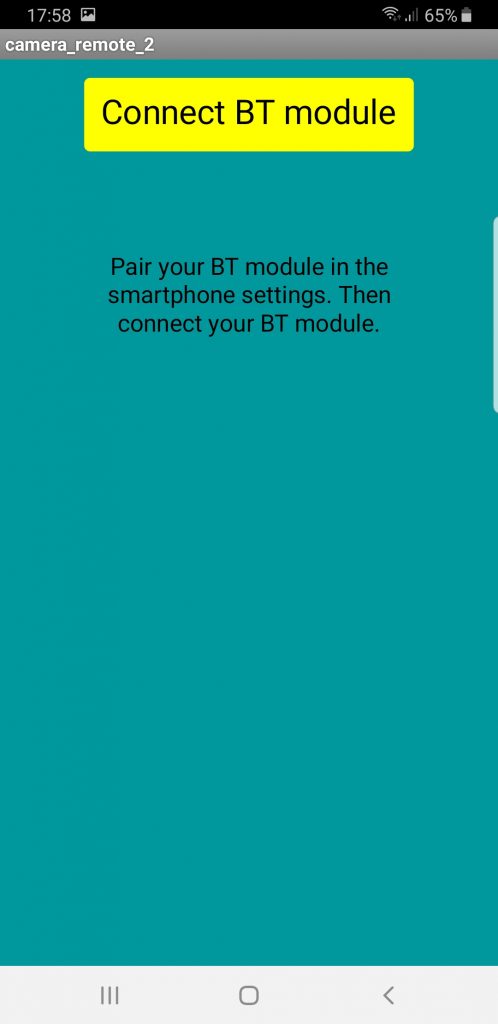
Now you can remotely trigger photos from the Arduino. The photos can be found in a separate folder. However, they should also be displayed in the gallery if you have ticked the corresponding box when creating the Tasker app (see step-by-step instructions).
Appendix – Detailed instructions for the Tasker app
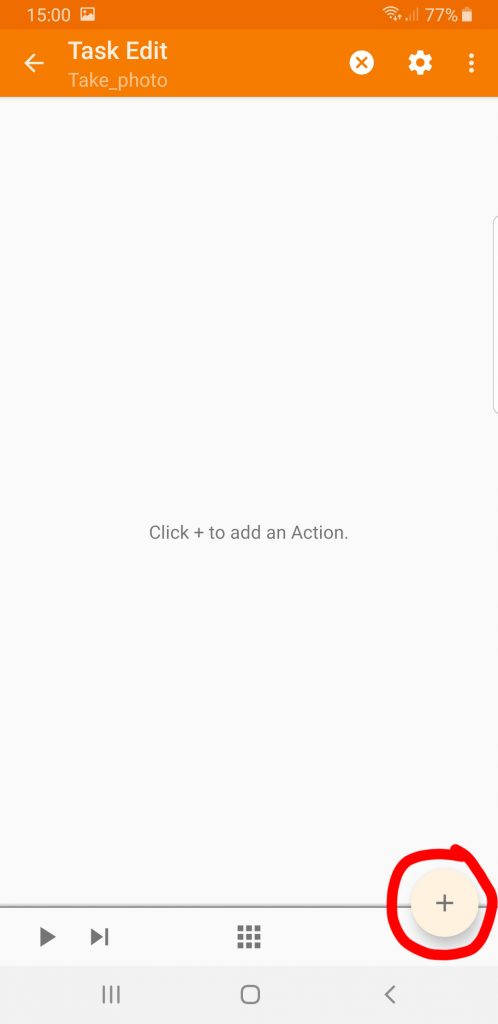
Here is the detailed guide to creating the Take_photo app. Tasker may need to get used to it at the beginning, but with this photo series you should get it done within a few minutes.


Acknowledgement
I thank Pura Vida Apps for allowing everyone to download the apk file based on the Camera Extension.
Hello, and thank you for sharing us your work ;
I search something like this, to have also zoom possibilities, not only shutting..
unfortunately link for App inventor is broken 🙁
Hello, sorry. You mean the link to the .aia file, right? Now it should work. Can you try and feedback?
SUCCESS! – with some limitations. I was experimenting with the following setup: Samsung Galaxy Ace4 with Android 4.4.4, camera_remote.apk installed; HC-05; Arduino Nano; and 18650 battery with a PS board, all in a box. First I tried your take_photo_every_15_min.ino sketch (modified for 5sec), Bluetooth ON , started app, then connected to HC-05 and the phone went to sleep mode. Surprisingly, the phone”s Bluetooth remained active and activated the app to take photos in sleep mode, while the screen remained off – and it hardly draines the phone battery. I managed to compile a decent 1,5 minute 25fps time lapse video during sunset in my garden after 3 hours of operation. I was satisfied with the result.
For the second attempt, I connected a PIR module – this setup operates only with limitations. I wrote a simple sketch. It works but unfortunately it takes too long (4-5 sec) for the camera to take a photo, and it can take the next photo again in 4-5 sec. Sadly, I cannot use it for my purpose as a trail camera (detecting neighbours cats in the garden) but I am still happy with it.
I will try the Remote Shutter unit when it arrives – I hope for a quicker response but have doubts. Thank you again for your post, it was fun to build!
Thanks for this very comprehensive feedback. Happy that it works. I am sure your observations will help others. Have fun and stay healthy!
Thank you for your answer. So my options are limited: I turn the light down manually on the phone screen, turn off screen lock (unfortunately the max period is 30min), and attach a power bank as a charger to the phone – and see how long this lasts. Unless the bluetooth shuts off. I need to check. Any recommendation?
I intend to use it outdoor (in a covered area) so I need to wait for a better weather (Hungary) when the morning damp would not ruin everything. I cannot wait for the shutter to arrive. I also wait for my HC-05 order as I used my previous batch for robots. I have an MLT-BT05-V4.0 but the MIT App Inventor BLE library does not seem to support Android 4.4. (This is the Android version of my old Samsung I am going to use.) But let’s have fun!
You just have try out. Sometimes phones behave differently depending on model and Android version. I hope things will work and weather will be fine soon. I am also looking forward to spring. Good luck!
Great job, I appreciate it! That’s what I’ve been looking to achieve: taking picture with my old, unused phone triggered by a PIR sensor (with an Arduino board) via BT. I bought and plan to hack a remote shutter (just waiting for the delivery); in the meantime I take my chances with the camera_remote.apk. I made a few simple apps with App Inventor – can you send me the .aia file so that I can customise it?
I plan to do a battery operated arrangement (Li-Ion PS for Arduino and the phone would use its own battery).
What bothers me is that in both cases (shutter unit or camera_remote.apk) the phone with the screen ON would not work for long, maybe only for a very few hours.
My question: how can it be achived that in order to save battery power the phone is in standby mode (or some power saving mode) but listening to incoming bluetooth signal? Can this be achieved with Tasker app?
I am sorry I can’t share the .aia file of the camera_remote app because the bigger part of it has been developed by Pura Vida. I am glad they allowed me to share the .apk file. I could only publish my part which is the screenshot in the article. If you want to design your own app you will anyway need to purchase the camera extension. And part of it is the aia file on which my app is based.
Regarding your second question: I don’t think it will work to wake up a smartphone via Bluetooth. That’s the problem with smartphones: they usually work safely without crashes, but the rights of the user are quite limited. It would be great to programme them like MCUs with sleep modes and interrupts that wake them up.
Dear Wolfgang, thank you for the quick reply. I understand your reasons for not sharing the aia file. I still would like to try maybe all three solutions and for each of them there is the power issue. (I only assume that the shutter device also needs the phone to be awake – am I right?)
A half solution to save battery power would be to keep the phone awake (prohibit sleep mode) , keep BT listening and switch off screen backlight. I would appreciate any idea how to achieve these (I am ready to purchase the Tasker if needed.)
The phone needs to be awake and the camera app needs to be active. If the camera app is not active, the remote shutter controls the volume of my phone.
Overall my experience with the shutter was somehow interesting, but also a bit frustrating. At the end I was only half way happy. I could overcome some of the obstacles, but the issue I couldn’t solve was a way to wake up the phone and start the camera app externally. And keeping it always awake empties your battery quite quickly.