About this post
After covering the Arduino IoT Cloud and Arduino SIM / Sigfox in my previous posts, I want to stick to the topic of IoT (Internet of things) with this article about IFTTT (if this then that) and webhooks. But this time there is no need to invest in high-priced boards, everything is explained using the inexpensive ESP8266 ESP-01 as an example.
Tracking readings online or switching devices is a fine thing. But wouldn’t it be nice to be informed by email, text message, notification or even by a phone call that a temperature is out of control, the water level is too high or the alarm system has gone off? No problem with IFTTT, which by the way is pronounced like “ift” in “gift”. But I also show you how to view the measured values online in your browser or how to switch devices.
As usual, I explain all this step by step. However, I do not go into the basics of the ESP8266 ESP-01. If needed, you can find details about this topic in my post on it.
The advanced users can skip one or the other step in this post. It is structured as follows:
- Introduction to IFTTT
- Wiring for all sketches
- Create a trigger via a sketch
- Output and control via browser
- All combined: browser control and IFTTT
- Using webhooks in the Arduino IoT Cloud
What is IFTTT?
IFTTT is a very flexible Internet service that allows you to link various other services in the sense of “if this, then that”. IFTTT was developed by Linden Tibbets and went into operation in 2010.
The principle is simple: you define a trigger in a service and then specify which action is triggered by which other service. Trigger and action together form the so-called applet. There is an almost unmanageable number of services that can be used as triggers or for action.
It becomes clearer when we go through a concrete, simple example that has nothing to do with Arduino, ESP and Co. yet.
An IFTTT Introduction
Sign up for IFTTT
Before you can do anything with IFTTT, you must have an account. Go to the IFTTT home page and sign up with your Google Account (“Continue with Google”):

That’s it – you have your IFTTT account. Skip the next window (“Get Started”).
IFTTT is actually incredibly simple, but from my point of view not overall intuitive. A helpful rule is: if you want to do anything on IFTTT, then a click on your picture or the gray symbol at the top right is a good starting point – try it and a menu will appear:

Go to “Account”. There you can see some settings, e.g. to which other accounts your IFTTT account is connected. For the following example, you must be connected to your Google account.
A simple IFTTT example
As a trigger application, we take the Google Assistant on your smartphone. If you haven’t installed it, you’ll find it on Google Play. You could also take Siri, Cortana or Alexa. With Cortana, I tried it successfully, Siri and Alexa I don’t use. The trigger itself is the voice instruction “sende mir eine E-mail” (= e-mail me). Sorry – I did not find the time to repeat everything in English, so you will see some German in the pictures. As an action, IFTTT should send an e-mail.
IFTTT is also available as a smartphone app. So, you might as well do the following steps on your smartphone.
Let’s start: navigate to IFTTT, click on your profile picture, then click on “Create” and finally on “+ This”:

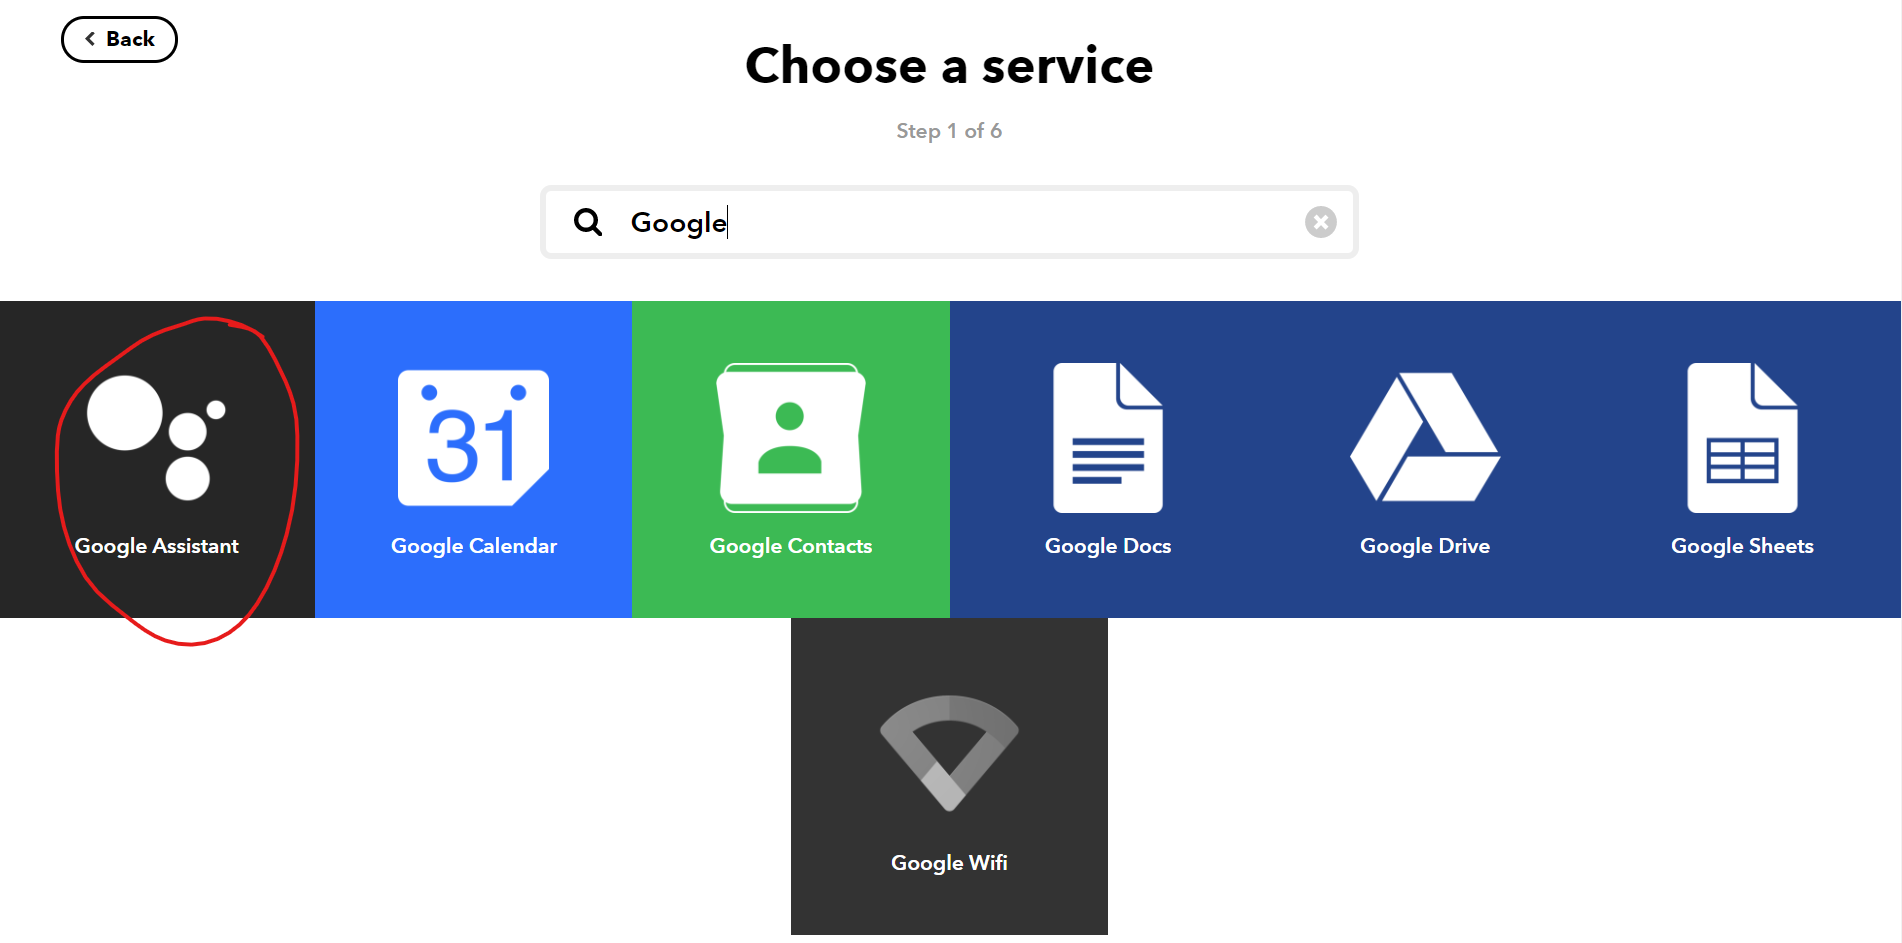
You will then be prompted to “Choose a service”. Enter “Google” and select “Google Assistant”.
Select “Say a simple phrase”:

Before you type the phrase in the next window, you should test speak it to Google Assistant and adjust the spelling if necessary. In this example, “email me”, i.e. without the hyphen, would not work.
Insert the phrase and maybe one or two more variations. You can also have the Google Assistant respond. I chose “na gut” (= okay).

Select “Create Trigger”. Then you click on “+That” in the next window:

Now we come to the action part. For this, you type “email” in the next window (Choose action service) and select “Email”. In another window, click “Send me an email”. Then you can give free rein to your creativity in terms of theme and content:

Click “Create Action” and in the next screen click “Finish”.

That’s it:

Take your smartphone and access the Google Assistant. Speak your phrase. If you have Google Voice Control enabled, you can also speak directly to Google (“Hey Google”, “OK Google” or microphone icon).
Google Assistant responds with the previously defined response:

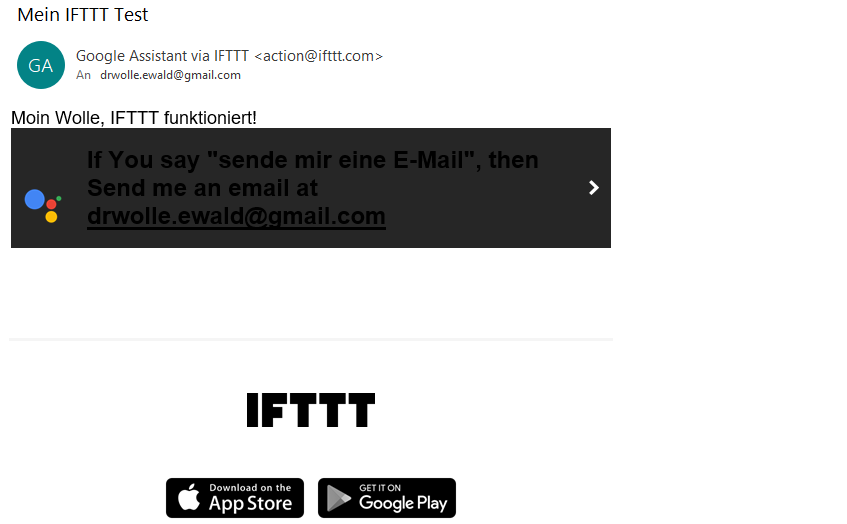
After a few seconds, you should receive an IFTTT email that looks similar to this one:
If you want to modify your applet later, then go to your profile picture at the top right and select “My Applets”. Select the applet in question. If you want to change the key phrase then select Settings at the top right. There you can also delete the applet. If you want to change the trigger or action, go to the respective symbol. In case you want to disable the applet, click “Connected”.
It’s also worth trying out some of the different examples on IFTTT. To do this, go to “Explore”. However, to take a closer look at the examples, you first need to connect them. Without that, you can’t access the settings.
Preparations
Wiring
For the further course we need something to switch and something to read out. I chose an LED and a DHT22 temperature and humidity sensor. Of course, you can take anything else. My wiring looks like this:

A few comments on this:
- With the DHT22, don’t forget the pull-up resistor.
- As you can see, I connected the ESP8266 ESP-01 module via a USB-to-serial adapter. Alternatively, you can take an Arduino. How this works in detail is described here.
- The power supply via the adapter was not sufficient. I needed an external one. For breadboards, I recommend power supply adapters.
Test sketch
The following sketch is only for checking the circuit. If you have any problems later, you can exclude this factor.
#include "DHT.h"

#define LED_PIN 0
#define DHTPIN 2
#define DHTTYPE DHT22

DHT dht(DHTPIN, DHTTYPE);

void setup(){
  Serial.begin(9600);
  delay(1500);
  dht.begin();
  pinMode(LED_PIN, OUTPUT);
}

void loop() {
  static unsigned long lastMeasurement = millis();
  float myTemp = 0.0;
  if((millis() - lastMeasurement) > 3000){
    myTemp = dht.readTemperature();
    Serial.print("Temperatur: ");
    Serial.print(myTemp);
    Serial.println(" C");
    lastMeasurement = millis();
    toggleLED();
  }
}

void toggleLED(){
    static bool ledStatus = true;
    digitalWrite(LED_PIN, ledStatus);
    Serial.print("The light is ");
    if(ledStatus){
      Serial.println("ON");
    }
    else{
      Serial.println("OFF");
    }
    ledStatus = !ledStatus;
}
Create a trigger via a sketch
Now we get to an interesting point: how can one create a trigger with the ESP8266? This is where the webhooks come in. Hooks are interfaces in programs that allow access for other programs. And with webhooks, this just happens via the web.
The webhook on the IFTTT page
We create a new applet. Go back to your picture in IFTTT — > Create — > +This — > and then select “Webhooks” as your service. IFTTT suggests “Receive a web request” — > click on it. Assign a name for the event. I called it ESP8266_Event, but I could have taken “potato salad”. It does not matter, is what I am saying.

Click on “Create trigger” and then turn to “That”. As “Action service” select “Notifications” and click on the icon. You can choose from two actions:

We take the simple, left variant. In the next window, click on “Add ingredient”:
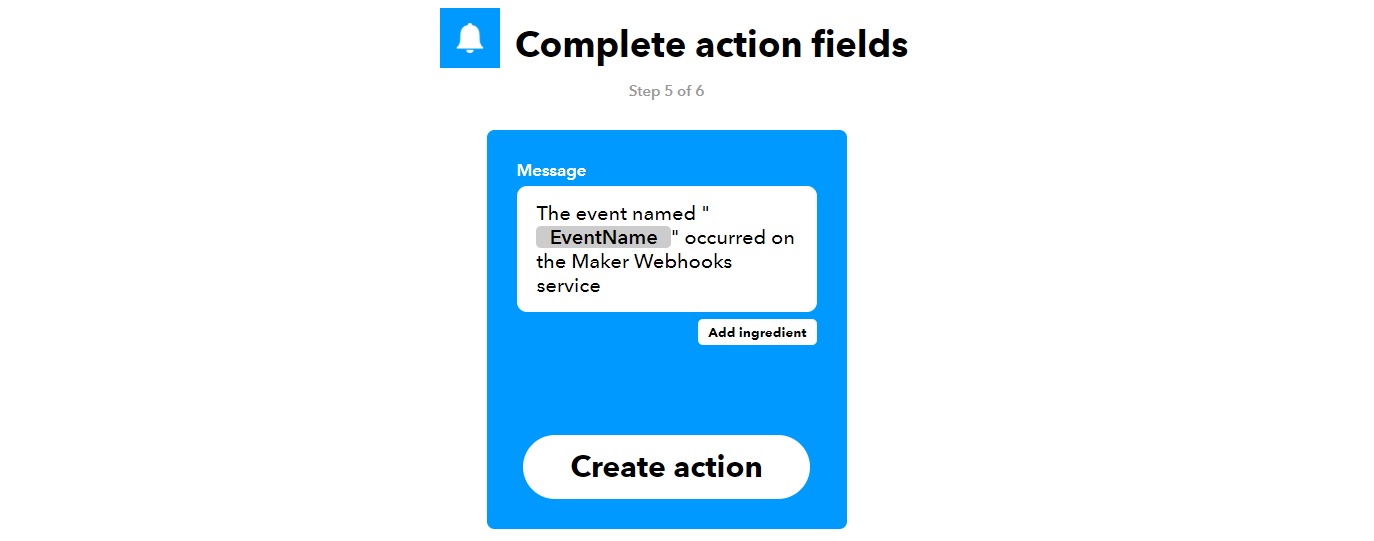
You can customize the content and add variables that are later passed through the trigger service. To do this, go to the text where you want to insert the variable, and then click the variable in the list. “Event Name” was already defined in IFTTT (ESP8266_Event). Here’s what it might look like (sorry again for the German lessons):

The quotation mark after “Event_Name” is an oversight – I removed it later.
Then click “Create action” and “Finish” in the next window. If you want to change the text later, that’s not a problem. Go to the profile picture – My Applets – Select applet – Settings.
Read the Webhook Key
Now you click the webhook icon ….

… and “Documentation” in the next window at the top right. You see a window like this (I made my key unrecognizable):

You need the key and event name right away for the Arduino sketch.
On the ESP8266 side
Now the question is what exactly you have to send from the ESP8266 to IFTTT so that it acts as a trigger and how you send it. About the “what”: In the simplest case, you send a web request with the content:
https://maker.ifttt.com/trigger/Event Name/with/key/euer Key
If you want to send variables, do it in JSON format:
{“value1″:”your value1“,”value2″:”your value2“,”value3″:”your value3“}
The request including variables and the sending to IFTTT is managed by the function send_webhook() in my example sketches.
The base sketch
You still need to customize the following sketch by entering the name of your Wi-Fi, the Wi-Fi password and your IFTTT key and modifying the event name if necessary.
In send_webhook(), you can pass three strings, which are then interpreted by IFTTT as “Value1”, “Value2” and “Value3”. In this example, I didn’t use Value3, but I still need to pass a dummy.
#include <ESP8266WiFi.h>

// Set WiFi credentials
#define WIFI_SSID "Name of your WiFi"
#define WIFI_PASS "Your WiFi password"

// Set IFTTT Webhooks event name and key
#define IFTTT_Key "Your IFTTT Key"
#define IFTTT_Event "ESP8266_Event" // or whatever you have chosen
#define IFTTT_Value1 "Moin, hier ist dein ESP8266!"
#define IFTTT_Value2 "25"
#define IFTTT_Value3 "value 3"

WiFiClient client;

void setup() {
  Serial.begin(9600); // Serial output only for information, you can also remove all Serial commands
  WiFi.begin(WIFI_SSID, WIFI_PASS);
  // Connecting to WiFi...
  Serial.print("Connecting to ");
  Serial.print(WIFI_SSID);
  while (WiFi.status() != WL_CONNECTED)
  {
    delay(100);
    Serial.print(".");
  }

  // Connected to WiFi
  Serial.println();
  Serial.print("Connected! IP address: ");
  Serial.println(WiFi.localIP());

  // Send Webook to IFTTT
  send_webhook();
}

void loop() {
  // empty
}

void send_webhook(){
  // construct the JSON payload
  String jsonString = "";
  jsonString += "{\"value1\":\"";
  jsonString += IFTTT_Value1;
  jsonString += "\",\"value2\":\"";
  jsonString += IFTTT_Value2;
  jsonString += "\",\"value3\":\"";
  jsonString += IFTTT_Value3;
  jsonString += "\"}";
  int jsonLength = jsonString.length();
  String lenString = String(jsonLength);

  // connect to the Maker event server
  client.connect("maker.ifttt.com", 80);

  // construct the POST request
  String postString = "";
  postString += "POST /trigger/";
  postString += IFTTT_Event;
  postString += "/with/key/";
  postString += IFTTT_Key;
  postString += " HTTP/1.1\r\n";
  postString += "Host: maker.ifttt.com\r\n";
  postString += "Content-Type: application/json\r\n";
  postString += "Content-Length: ";
  postString += lenString + "\r\n";
  postString += "\r\n";
  postString += jsonString; // combine post request and JSON

  client.print(postString);
  delay(500);
  client.stop();
}
Now, if you run the sketch, you should receive a notification on your phone within a few seconds:

If your phone is locked, it depends on your settings whether the notification appears on the lock screen or not. But at the latest when you unlock it, it should be visible.
The sketch with “real” temperatures
Now we extend the sketch with the temperature measurement. The temperature is measured every five seconds. I have defined that I will only be informed if the temperature falls below 20 degrees. I created this condition with cold spray. Of course, you can also take an upper limit, which you exceed e.g. by blowing on the DHT22 or touching it.
Then I defined that I would only be notified once a minute so that I would not be bombarded with notifications when the temperature drops below 20 degrees. If all conditions are met, the temperature is converted from float to string and then passed to send_webhook().
The one-off call send_webhook() in setup() is only for checking whether the webhook is working.
Of course, you can also output the temperature readings on the serial monitor. I deliberately didn’t integrate this into the sketch to make it clearer.
#include <ESP8266WiFi.h>
#include <DHT.h>

#define DHTPIN 2
#define DHTTYPE DHT22

// Set WiFi credentials
#define WIFI_SSID "Name of your WiFi"
#define WIFI_PASS "Your WiFi password"

// Set IFTTT Webhooks event name and key
#define IFTTT_Key "Your IFTTT Key"
#define IFTTT_Event "ESP8266_Event"
#define IFTTT_Value1 "Moin"
#define IFTTT_Value3 "dummy"
String tString = "999"; // temperature as String

WiFiClient client;
DHT dht(DHTPIN, DHTTYPE);

void setup() {
  WiFi.begin(WIFI_SSID, WIFI_PASS);
  while (WiFi.status() != WL_CONNECTED){
    delay(100);
  }

  dht.begin();
  delay(2000); // better to give some time

  send_webhook(tString); // just a Test
}

void loop() {
   static unsigned long lastMeasure = 0;
   if((millis()-lastMeasure) > 5000){
    updateTemp();
    lastMeasure = millis();
  }
}

void updateTemp() {
  static unsigned long lastIFTTT = 0;
  float myTemp = dht.readTemperature();
  tString = String(myTemp,1); // convert temperature as float into String
  if((myTemp < 20.0) && ((millis()-lastIFTTT)) > 60000){
    send_webhook(tString);
    lastIFTTT = millis();
  }
}

void send_webhook(String IFTTT_Value2){
  // construct the JSON payload
  String jsonString = "";
  jsonString += "{\"value1\":\"";
  jsonString += IFTTT_Value1;
  jsonString += "\",\"value2\":\"";
  jsonString += IFTTT_Value2;
  jsonString += "\",\"value3\":\"";
  jsonString += IFTTT_Value3;
  jsonString += "\"}";
  int jsonLength = jsonString.length();
  String lenString = String(jsonLength);

  // connect to the Maker event server
  client.connect("maker.ifttt.com", 80);

  // construct the POST request
  String postString = "";
  postString += "POST /trigger/";
  postString += IFTTT_Event;
  postString += "/with/key/";
  postString += IFTTT_Key;
  postString += " HTTP/1.1\r\n";
  postString += "Host: maker.ifttt.com\r\n";
  postString += "Content-Type: application/json\r\n";
  postString += "Content-Length: ";
  postString += lenString + "\r\n";
  postString += "\r\n";
  postString += jsonString; // combine post request and JSON

  client.print(postString);
  delay(500);
  client.stop();
}

Output and control with the browser
Now we briefly leave the IFTTT functionalities and output the temperature readings in the browser. In addition, we switch the LED in this way. Later, the IFTTT functionality is added again. I want to avoid overwhelming less experienced readers, so I’m doing it step by step. It also makes troubleshooting easier if something doesn’t work.
In my article about the ESP8266 ESP-01 I had already explained how to control or read an LED or a temperature sensor via browser. I repeat this here, but I will not go into details. If you don’t understand the following things, please go back to the post (or just take it as given).
You must know which IP has been assigned so that you can call up the correct page in the browser. The IP is output the serial monitor. You probably do not want to do this again and again. It is best to let the router assign the IP once and then set the router to always give the ESP8266 the same IP. Most routers can do this.
#include "ESP8266WiFi.h"
#include "ESP8266WebServer.h"
#include "DHT.h"
#define LED_PIN 0
#define DHTPIN 2
#define DHTTYPE DHT22
DHT dht(DHTPIN, DHTTYPE);
const char* ssid = "Name of your WiFi";
const char* pass = "Your WiFi password";
ESP8266WebServer server(80);
String led1= "<BR><BR><a href=\"/led_an\">LED An</a>";
String led0= "<BR><BR><a href=\"/led_aus\">LED Aus</a>";
String message1
= "<head><meta http-equiv=\"refresh\" content=\"10\"></head>"
"<h1>Temperaturprogramm ESP8266</h1><BR><BR>"
"Die Temperatur beträgt: ";
String message = "";
String tString = "999";
bool ledStatus = false;
void ledan(){
ledStatus = true;
digitalWrite(LED_PIN, HIGH);
message = message1 + tString;
message += led0;
server.send(200, "text/html", message);
}
void ledaus(){
ledStatus = false;
digitalWrite(LED_PIN, LOW);
message = message1 + tString;
message += led1;
server.send(200, "text/html", message);
}
void handleRoot(){
ledaus();
}
void setup() {
Serial.begin(9600); // Serial output only for information, you can also remove all Serial commands
WiFi.begin(ssid, pass);
// Connecting to WiFi...
Serial.print("Connecting to ");
Serial.print(ssid);
while (WiFi.status() != WL_CONNECTED){
delay(300);
Serial.print(".");
}
Serial.println();
Serial.print("Connected! IP address: ");
Serial.println(WiFi.localIP());
server.on("/",handleRoot);
server.on("/led_an", ledan);
server.on("/led_aus", ledaus);
server.begin();
dht.begin();
pinMode(LED_PIN, OUTPUT);
}
void loop() {
static unsigned long lastMeasure = 0;
server.handleClient();
if((millis()-lastMeasure) > 5000){
updateTemp();
lastMeasure = millis();
}
}
void updateTemp(){
float myTemp = dht.readTemperature();
tString = String(myTemp);
message = message1 + tString;
if(ledStatus){
message += led1;
}
else{
message += led0;
}
server.send(200, "text/html", message);
}
Upload the sketch, launch it, and start your favorite browser. There you enter the above defined IP address in the address line. You can now see the temperature, and you can switch the LED. Admittedly, the appearance is quite spartan. If you’re fit in HTML, you can still make it up.
Maybe you want to access the project from outside your home network? The safest method is to access your home network via VPN and call the internal IP address from there. If you have a FritzBox, that’s not a problem at all. However, it should also work with many other routers.

All combined: browser control and IFTTT
In the final step, we combine the browser control with the IFTTT functionality. If you have understood the other sketches, then you should have no problem with this one. But I think if I had started with this sketch, one or the other might not have been able to follow.
#include "ESP8266WiFi.h"
#include "ESP8266WebServer.h"
#include "DHT.h"
#define LED_PIN 0
#define DHTPIN 2
#define DHTTYPE DHT22
// Set WiFi credentials
#define WIFI_SSID "Name of your WiFi"
#define WIFI_PASS "Your WiFi password"
// Set IFTTT Webhooks event name and key
#define IFTTT_Key "Your IFTTT Key"
#define IFTTT_Event "ESP8266_Event"
#define IFTTT_Value1 "Moin"
#define IFTTT_Value3 "dummy"
DHT dht(DHTPIN, DHTTYPE);
WiFiClient client;
ESP8266WebServer server(80);
String led1= "<BR><BR><a href=\"/led_an\">LED An</a>";
String led0= "<BR><BR><a href=\"/led_aus\">LED Aus</a>";
String message1= "<head><meta http-equiv=\"refresh\" content=\"10\"></head>"
"<h1>Temperatur-LED Programm ESP8266</h1><BR><BR>"
"Die Temperatur beträgt: ";
String message = "";
String tString = "999";
bool ledStatus = false;
void ledan(){
ledStatus = true;
digitalWrite(LED_PIN, HIGH);
message = message1 + tString;
message += led0;
server.send(200, "text/html", message);
}
void ledaus(){
ledStatus = false;
digitalWrite(LED_PIN, LOW);
message = message1 + tString;
message += led1;
server.send(200, "text/html", message);
}
void handleRoot(){
ledaus();
}
void setup() {
Serial.begin(9600);
WiFi.begin(WIFI_SSID, WIFI_PASS);
Serial.print("Connecting to ");
Serial.print(WIFI_SSID);
while (WiFi.status() != WL_CONNECTED)
{
delay(100);
}
Serial.println();
Serial.print("Connected! IP address: ");
Serial.println(WiFi.localIP());
server.on("/",handleRoot);
server.on("/led_an", ledan);
server.on("/led_aus", ledaus);
server.begin();
dht.begin();
pinMode(LED_PIN, OUTPUT);
delay(1000); // some waiting time
send_webhook(tString); // only a test
}
void loop() {
static unsigned long lastMeasure = 0;
server.handleClient();
if((millis()-lastMeasure) > 5000){
updateTemp();
lastMeasure = millis();
}
}
void updateTemp() {
static unsigned long lastIFTTT = 0;
float myTemp = dht.readTemperature();
tString = String(myTemp);
if((myTemp < 20.0) && ((millis()-lastIFTTT)) > 30000){
send_webhook(tString);
lastIFTTT = millis();
}
message = message1 + tString;
if(ledStatus){
message += led1;
}
else{
message += led0;
}
server.send(200, "text/html", message);
}
void send_webhook(String IFTTT_Value2){
// construct the JSON payload
String jsonString = "";
jsonString += "{\"value1\":\"";
jsonString += IFTTT_Value1;
jsonString += "\",\"value2\":\"";
jsonString += IFTTT_Value2;
jsonString += "\",\"value3\":\"";
jsonString += IFTTT_Value3;
jsonString += "\"}";
int jsonLength = jsonString.length();
String lenString = String(jsonLength);
// connect to the Maker event server
client.connect("maker.ifttt.com", 80);
// construct the POST request
String postString = "";
postString += "POST /trigger/";
postString += IFTTT_Event;
postString += "/with/key/";
postString += IFTTT_Key;
postString += " HTTP/1.1\r\n";
postString += "Host: maker.ifttt.com\r\n";
postString += "Content-Type: application/json\r\n";
postString += "Content-Length: ";
postString += lenString + "\r\n";
postString += "\r\n";
postString += jsonString; // combine post request and JSON
client.print(postString);
delay(500);
client.stop();
}
Webhooks with the Arduino IoT Cloud
Arduino IoT Cloud and IFTTT
Then I tried to use the webhooks from Arduino IoT Cloud with IFTTT. In principle, it’s simple. You take the webhook from IFTTT, replace “{Event_Name}” by the variable of your property (here: “myTemp”) and apply it in the “Webhooks” tab of your “Thing”.

If this is all Greek to you, read my article about the Arduino IoT Cloud.
The problem is that with every call of ArduinoCloud.update() an IFTTT action is triggered. If, on the other hand, you only call the function in case a certain condition occurs, you will not be able to track the readings. At least not as long as the measured values are within the limit values. I couldn’t find a way to call the webhook manually in the sketch – that would be the solution. I don’t say that it can’t be done somehow, but I’ve been trying for quite some time unsuccessfully.
Other Webhook Applications in the Arduino IoT Cloud
But to rescue the reputation of the Arduino IoT Cloud, I have to say that there are still some cool other webhook applications.
If you’re interested in this, take a look at these examples:
Acknowledgement
I thank Siytek for his AnotherIFTTTWebhook.h adaptation on Github.